Showing posts with label bread. Show all posts

Friday, February 16, 2018

10th Anniversary! Bread Baking Babes celebrate


This is the 10th Anniversary of our Babe-dom and aren’t we still looking cute? 10 years of baking bread together, every month one of us picks the next challenge and we bake, we try, we drink endless bottles of virtual wine. Same recipe, different kitchens, using local flour and sharing what we found. You can read all about our monthly recipe at the Kitchen of the Month, our individual posts to be found at our respective personal blogs. Every once in a while life has us take a place on the bench in the back (there where an extra bottle of spirits is taped under) but we bounce back and bake on. We’ve had Babes on Hiatus, Babes backing out for various life-living reasons. We were shocked to hear of the passing of one of our early Babes Sher.


Tanna and I started this from enjoying the Daring Bakers (remember?) and decided we wanted this club to stay small and together so there were the Baking Babes… and from it the Baking Buddies were born. Lien (Notitie van Lien) is the genius behind all the (Buddy) Badges and... drum roll; she baked ALL our challenges. I think that's worth a special mention!

Our first combined effort in February 2008 was a bread in the "wet dough spectrum"; specifically the Royal Crown Tortano. (Recipe Maggie Glezer’s Artisan Baking) Characteristics of this bread are a mild pre-ferment, the addition of a small amount of potato in the dough, very very long rising time but little handling of the dough, using the tiniest amount of yeast to produce a deep dark brown crusty loaf of bread. Above is how it looked back in 2008!

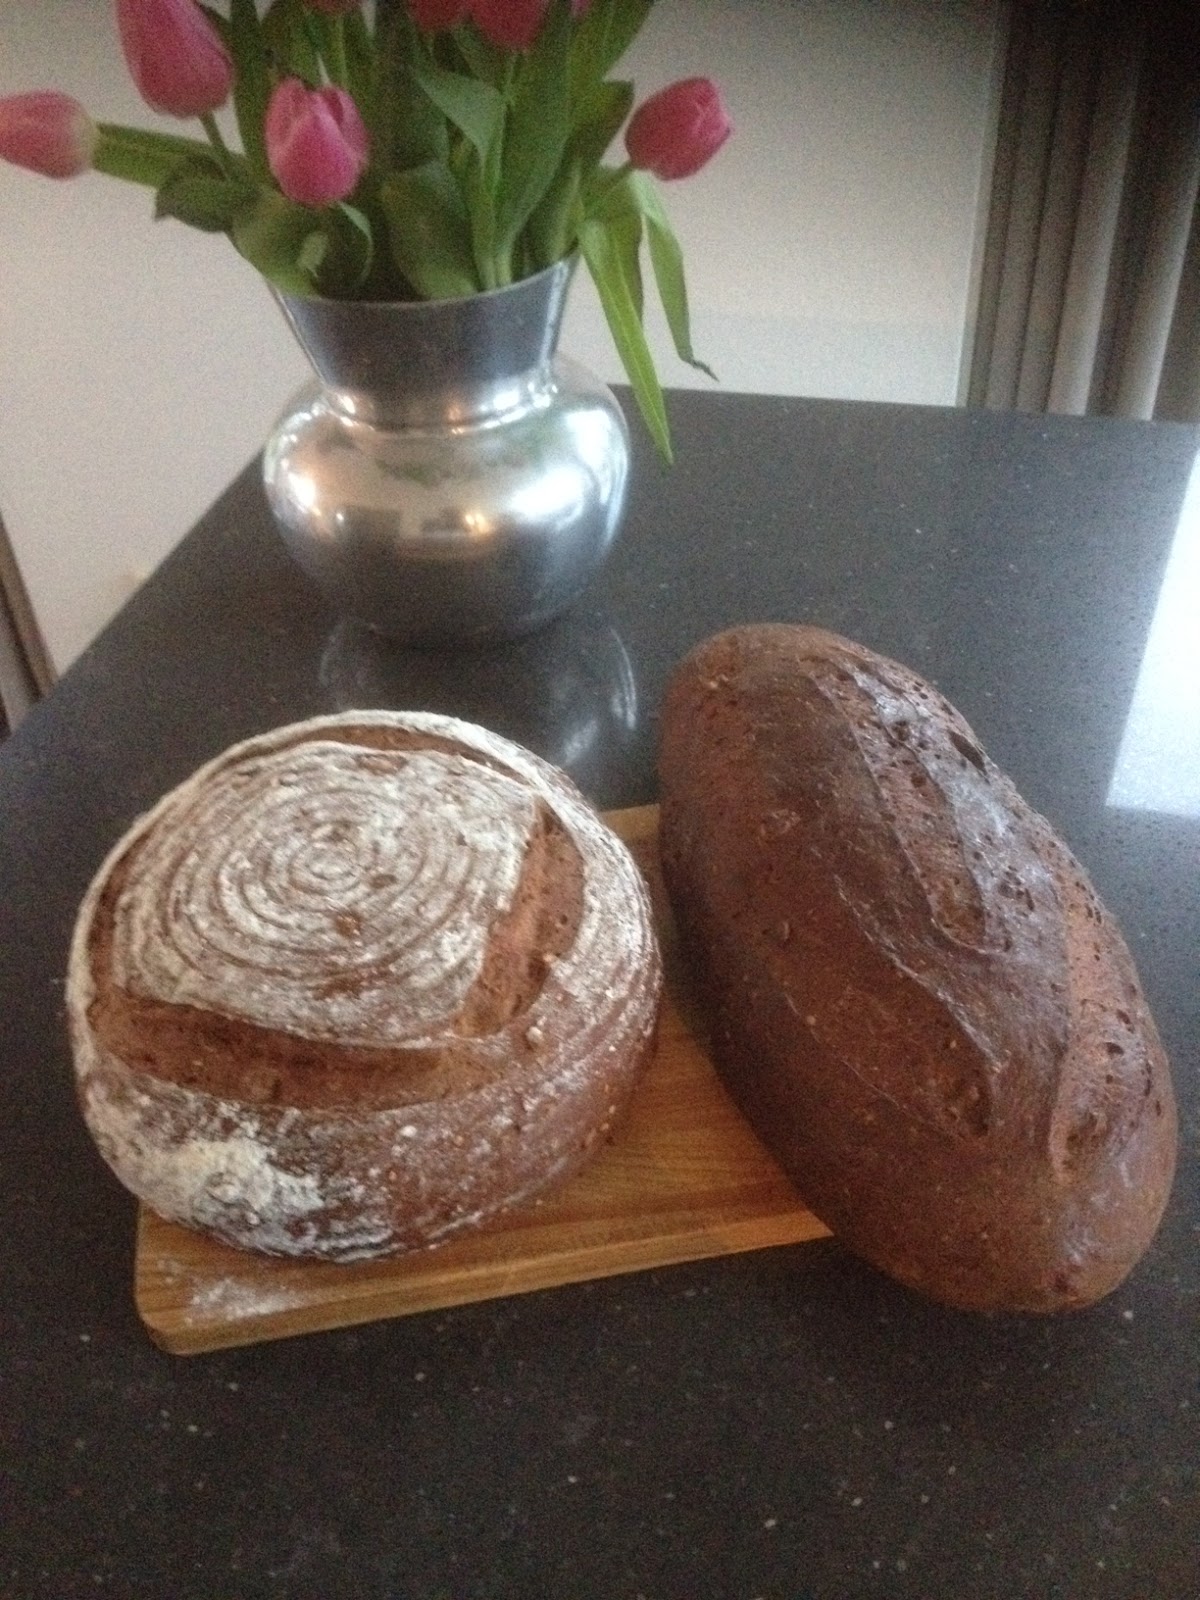
We decided to bake this iconic bread again for our 10th Anniversary! And this is how it looks like today:


So yes, this is a 74% liquid dough, silken and smooth and quite a challenge to handle. This time the hole in the middle closed up during baking, the crust as it should be, crackling and the crumb shot through with large holes. Dipped in olive oil…. or a lick of salted butter?
I've made this bread several times and already posted the recipe in Dutch and talked about the bread here and here. The recipe in English:
Royal Crown Tortano - revisited
(based on Karen's (Bake My Day) 2008 take on Maggie Glezer's recipe
Recipe Synopsis
The Evening Before Baking: Make the starter and if you like the mashed potato.
The Next Morning: Mix the dough and let it ferment for about 4 hours. Shape it, proof it for about 1 1/2 hours, and then bake the bread for about 45 minutes.
The Evening Before Baking: Making the Pre-Ferment:

Pre-Ferment Ingredients

1 gm (1/4 tsp) instant yeast
240gm (1 cup) water 105 - 115 degrees F
100gm (2/3 cup) unbleached bread flour
85gm (1 small) potato
Stir the yeast into the water in a glass measure and let it stand for 5 - 10 minutes. Add 1/3 cup of this yeasted water (discard the rest) to the flour and beat this very sticky starter until it is well combined. Cover with plastic wrap and let it ferment until it is full of huge bubbles and sharp tasting, about 12 hours. If your kitchen is very warm and the pre-ferment is fermenting very quickly, place it in the refrigerator after 3 hours of fermenting. In the morning, remove it and allow it to come to room temperature 30 minutes to an hour before beginning the final dough

Preparing the Potato:
For efficiency, you may want to prepare the potato the night before. Quarter it, then boil it in water to cover until it can be easily pierced with a knife tip, about 20 minutes. Drain; if desired, reserve the water for the dough. Press the potato through a ricer or sieve to puree it and remove the skin. Store it in a covered container in the refrigerator. You will need only 1/4 cup puree.

Bake Day: Mixing the Dough
Dough Ingredients
575gm  (3+3/4 cups) unbleached bread flour
420gm (1+3/4 cups plus 3 Tbsp) Water, including the potato water if desired, lukewarm
all of the pre-ferment
11gm (2 tsp) honey
60gm (1/4 cup packed) Potato puree
16gm (scant 1 Tbsp) salt

By Hand: Use your hands to mix the flour and water into a rough, very wet dough in a large bowl. Cover the dough and let rest (autolyse) for 10 - 20 minutes.
Add the pre-ferment, honey, potato, and salt, and knead the dough until it is smooth, 5 - 10 minutes. It will start off feeling rubbery, then break down into goo; if you persist, eventually it will come together into a smooth, shiny dough. If you do not have the skill or time to knead it to smoothness, the bread will not suffer. This is a tremendously wet and sticky dough, so use a dough scraper to help you but do not add more flour, for it will ruin the texture of the bread.
By Stand Mixer: With your hands or a wooden spoon, mix the flour and water into a rough, very wet dough in the work bowl of your mixer. Cover the dough and let it rest (autolyse) for 10 - 20 minutes.
Fit the mixer with the dough hook. Add the pre-ferment, honey, potato and salt and the mix the dough on medium speed for 15 - 20 minutes, or until very silky and wraps around the hook and cleans the bowl before splaterring back around the bowl. This dough is almost pourably wet.

Fermenting and Turning the Dough:
Shape the dough into a ball and roll it in flour. Place it in a container at least 3 times its size and cover tightly with plastic wrap. Let it ferment until doubled in bulk and filled with large air bubbles, about 4 hours. Using plenty of dusting flour, turn the dough 4 times in 20 minute intervals, that is, after 20, 40, 60, and 80 minutes of fermenting, the leave the dough undisturbed for the remaining time. Do not allow this dough to over ferment or ferment to the point of collapse, for the flavor and structure of your bread will suffer.


Shaping and Proofing the Dough:
Turn the fermented dough out onto a well floured work surface, round it and let it rest for 20 minutes. Sprinkle a couche or wooden board generously with flour. Slip a baking sheet under the couche if you are using one for support.
Sprinkle a generous amount of flour over the center of the ball. Push your fingers into the center to make a hole, the rotate your hand around the hole to widen it, making a large 4 inch opening. The bread should have about 12 inch diameter.
Place the dough smooth side down on the floured couche or board and dust the surface with more flour. Drape it with plastic wrap and let it proof until it is light and slowly springs back when lightly pressed, about 1 1/2 hours.

Preheating the Oven:
Immediately after shaping the bread, arrange a rack on the oven's second to top shelf and place a baking stone on it. Clear away all the racks above the one being used. Preheat the oven to 450 degrees (230 C)


Baking the Bread:
Unwrap the bread and flip it onto a floured peel or a sheet of parchment paper. Do not worry about damaging the bread as you handle it; it will recover int eh oven as long as it is not overproofed. Slash it with 4 radial cuts in the shape of a cross. Slide the loaf onto the hot baking stone and bake until it is very dark brown, 40 -50 minutes, rotating it halfway into the bake. Let the bread cool on a rack.

Baker's Percentages

100% unbleached bread flour
74% Water, including the potato water
0.15% yeast
2% honey
10% potato puree
2.4% salt
If you would like to become a Bread Baking Buddy, here’s how it works:
  • The Kitchen of the Month (Tanna this time!) will post the recipe and you'll find any information about due date for posting in their post.
  • Email The Kitchen of the month with your name and the link to the post.
  • Post your "baking the bread" experience on your blog mentioning Bread Baking Babes with a link to the Kitchen of the Month.
  • The Kitchen of the Month will put up a list of our Bread Baking Buddies at her site and send you a neat BBB award for this bread that you can then add to your post on your blog.

C'mon, you know you want one of those badges, so cleverly designed by Lien! (thanks Lien, you're a gem!)


Friday, June 30, 2017

Round-up BBB June edition: Ka'ak

Despite the summer heat,( which is completely gone now. As I am writing this it is pouring!) we had fun baking this bread and found there was only one Buddy baking! I waited an extra day but alas, not other takers for our Buddy Badge.


The first and (only) to mail me with results was Gilead, who not only made a vegan version but also baked the Ka'ak in this interesting oven (see below). Now I want one too! I really think I need such an oven in my life!

Imagine the kind of pizza's and flatbreads you will make....


Well done Gilead! Thank you for baking with us, you're a real trooper!


Friday, June 16, 2017

Bread Baking Babes June 2017: Kaak bread (a Lebanese bread with sesame seeds)


Good morning all!


This is the June edition for 2017. Ladies, got your handbags ready? I've got you covered with this hand-bag shaped bread. So easy to take your lunch with you don't you think?

I chose to bake "Kaak" a lebanese bread with sesame seeds, which I think is similar to the Turkish simit. Every time I go into the turkish shop to buy spices (or meat, or dates, olives, herbs... most of the time all of the afore mentioned) I cannot resist buying simit. I've learned to buy one more than needed because I tear into one on my way home. Still I never managed to copy the bread.

Since we're gradually edging towards better weather (we are, aren't we?) and this particular bread is sold on the streets of Beirut I think this will be a nice one to bump us into outdoor food.

This little snippet is what Elizabeth found on reading up on these breads:
 "Sesame Galettes, in one form or another are a street staple throught the eastern Mediterranean [...] In Greece, Turkey, and Egypt they are shaped into rings and in Greece they are made slightly sweet. In Lebanon they are shaped like handbags, and the vendor will tear the fat 'bag' part open to sprinkle the inside with a little za'tar. In tripoli and Syria the galettes are shaped into flat disks and are often sold filled halloumi cheese seasoned with sumac." - Anissa Helou, Turkish Sesame Galettes Simit, Mediterranean Street Food, p116 

Here you'll find some more information on the bread itself and the way it is baked and sold in Beirut. Street vendors hang the breads on a pole for easy transport! The recipe is a combined one, I read a couple of different recipes (The old Curiosity ShopGin´s KitchenHeghineh on youtube )
As I understand the vendor will create a pocket and the bread is filled on the spot with your choice of za'atar or soft cheese. Cream cheese may work but I'm also thinking of labneh or "hang-op" -> yoghurt strained in cheese cloth and then maybe add herbs to it?


Kaak
(makes about 10 8"breads using 100 grams per bread)
Ingredients: 
235 gr. (buttermilk) or regular milk ** (weighed my cup of buttermilk)
245 gr water **
2 tbs olive oil
1 ½ tbs sugar
2 tsp salt
1 tbs instant dry yeast, if using active dry yeast, be sure to activate in warm water
135 gr whole wheat flour **

490 gr all purpose flour, you may need a little more, but don’t add too much flour **
1 egg for egg wash
1-2 tbs sesame seeds per kaak
You will also need lined baking sheets

Directions: 

Knead: Fairly straight forward dough kneading...  This dough will need a normal rise until doubled. I've seen recipes that allow for a second bulk rise after degassing. What you'll be looking for is a malleable non-sticky dough.

**  If we are going to follow this recipe, and I just did, we'll be working with a 76% hydration which might be a bit much for the type of dough we're aiming to roll out and keep shape. My dough was very soft and plenty sticky. I used buttermilk instead of milk and had 480 grams of liquid against 625 grams combined flour. 
So I would suggest keeping some of the water back aiming for around 400 grams or maybe even less.

Shape; divide dough in equal parts (aim for 100 gram each) and ball up. Let rest to relax and using a dough pin roll each ball into a circle approx. 18cm / 7" diam., about 1.1/2 cm / 1/2 inch thick. 

Place the shaped breads on lined baking sheets, be careful not to stretch the dough. Use a large cookie cutter to cut out a circle near the top to form the "handle" and loosely cover to rise another 25-30 minutes. Egg wash the breads, sprinkle with sesame seeds. 
For a view of how to shape the breads without cutting a hole for the handle please watch this youtube by Heghineh :  https://www.youtube.com/watch?v=cdxMY-53pMU
She rolls the dough into a log about 22"-23" long, as you roll go thinner on the ends, Let the center thicker than the ends, Stick the ends together and using your fingers or a rolling pin make the middle part wider and flatter, shaping it as a handbag

Bake for 7-10 minutes or until golden and puffed in a pre-heated oven 200-220°C. I think they will benefit from a bit of steam in your oven. Use your preferred method; either ice cubes, boiling water in a heated pan... bake on a stone...


Notes:
Well...that didn't go as planned..... So I had this sticky dough and tried rolling it on a floured surface. Didn't work. Lightly oiled is better. Than the mention of a pocket made me think t of pita bread and so I tried rolling it very thin. No way you can make any kind of pocket in my bread!The pita thought was not right. Re-reading the recipe that tells me to roll out to 1.1/2 cm thick. That is not what I did. I rolled paper thin. Ugh. There is beauty in reading a recipe and following through!
after baking and eating: Next time I'll keep my disks somewhat thicker. Maybe the balls need to be bigger as well then to achieve the same size. I worked with 100 grams per individual bread.Another thing I did was brushing the bread with a wash of Pekmez, a fruit syrup made from grapes or dates. Mine was pomegranate and I mixed it with a little water, then brushed it on and sprinkled sesame seeds on. This is what they do with the simit. Pomegranate makes it a little sweet/tart I think grape or figs/dates syrup will be somewhat sweeter and better if you like to try it.


We loved the breead! Very soft and very airy crumb. Best eaten the same day it's made. We also love for you to bake along with us!

It would be great if you could join this challenge, post and let us know how it went. Join us as a Bread Baking Buddy, send your results and what you thought of this to the Kitchen of the Month (that's me) type BBB as subject to bakemyday(at)gmail(dot) com and you'll be send a Bread Baking Buddy Badge that you can add to your blog  if you like. Deadline the 29th of June!

The Babes are:

Bake My Day - Karen
blog from OUR kitchen - Elizabeth
Bread Experience - Cathy
Feeding my Enthusiasms - Pat/Elle 

 Karen's Kitchen Stories - Karen
My Diverse Kitchen - Aparna
My Kitchen In Half Cups - Tanna
Notitie Van Lien - Lien

A Messy Kitchen – Kelly  
Thyme for Cooking - Katie
Life's a Feast - Jamie


Friday, September 16, 2016

Bread Baking Babes go Coconutty; Coconut Rolls


Here's to September! I failed to do my July bit so I was pretty determined to be here now! Lien as our Kitchen of the Month chose for us to bake a tropical bun, filled with creamy coconut.

dough
2 TBsp sugar
160 ml lukewarm water
2 tsp dry instant yeast
300 g bread flour~(I used 150 bread/150 ap flour)
50 ml vegetable oil
3/4 tsp salt
filling
80 g + 2 TBsp dried, unsweetened, grated coconut
(or sweetened coconut, reducing the light brown sugar with 4 TBsp)
120 ml boiling water
150 g light brown sugar
4 TBsp corn starch
2 TBsp butter
pinch of cinnamon (optional)


Combine all the dough ingredients and stir them together. Knead the dough until smooth and souple. At first it’s very sticky, but after kneading it shouldn’t be very sticky anymore. Place the dough in a lightly greased bowl, cover and leave to rise fora bout 1½ hours or doubled in volume.

Now make the filling. When using dried coconut (80 g), it needs to soak in a bowl with boiling water. Leave soaking for 10-15 minutes.
Mix the cornstarch and sugar in a seperate little bowl before adding it to the coconut.
Melt the butter in a saucepan, add the coconut-sugar mixture and keep it on a low heat until it thickens, a few minutes. Keep stirring to avoid it burning.
Take it of the heat and leave to cool. When cooled, place in the fridge.
About 30 minutes before assembling the roll, take the filling out of the fridge.
Stir in the remaining 4 TBsp of coconut in. At first the filling might be a bit stiff, but a little stir will soften it enough. Set aside.

Divide the dough in two parts. Start with one piece, and roll it out into a rectangle of 30 x 16 cm. Now cut it lenght wise in two equal parts, so you have two long thin strips.
Place a quarter of the filling evenly over the middle of the strip. The filling should be fairly dry, don’t place wet filling on the dough.
Flip over one long side of the dough over the filling, then flip over the other side. The two sides should slightly overlap. Close the seam by pinching the dough together.
Turn the roll seam side down. Cut the roll in three equal parts. Push the filling back a little, so you can close the cut sides, so the filling is no longer to be seen and can’t leak out.


Repeat with the other three strips (the one that you have rolled out and the two strips you make of the remaining dough). Place the rolls, 4 cm apart, on parchment paper placed on two baking sheets. Cover them with lightly greased plastic and leave to rise for 35-45 minutes. They are ready when a light indentation, you make with a finger, stays visible.
While the dough proofs you should preheat the oven to 190ºC.
Bake the rolls for about 15-18 minutes until they are golden brown.(If you bake on two sheets, exchange them after 8 minutes, so they bake evenly)
Let the rolls cool on a wire rack. Eat them luke warm or at room temperature.

(Adapted from: “De kunst van het bakken” – J. Alfort & N. Duguid) 

~~~~~~~~~~~~

So, this is what my filling looked like, I wouldn't call it really dry but it sure was paste like, all sticky and malleable. My filling weighed in about 200 grams, so I used 50 grams for each strip of dough. 
The dough itself is very nice to work with, supple and elastic. I used half AP flour/half bread flour. In the book they say to use a combination of cake flour and AP flour, Lien said to use all bread flour so I took the middle ground and did half/half. :-)
Furthermore I did add a bit of salt, a heaped half teaspoon. (Or rather, the book said 1 teaspoon, did just that and thought nooooo, far too much... and scooped some out. Very scientific I know!)
And I added a bit of orange zest to the dough. Why? Just because I could.

 As I said, very easy to work with, I rolled 7 by 14 inches which made the filling spreading thin but then again it was easy to fold the dough over the filling, as seen below.


The first two strips I did as I was told and cut the long roll in 3 equal parts. The other two long rolls I decided to cut in 4 equal parts. Easier and I like the shorter plump rolls you get this way. See below.


Here again with the resulting buns. Family shot on top and the inside. Lien, they remind me of "Brabantse worstebroodjes" in looks! They feel wonderfully light, smell rich and sweet. Haven't tasted them yet. I cut one open for a picture (it was the most crooked looking) and indeed the filling not right in the middle. Quite airy don't you think?

I brushed the hot buns with a little butter. Mmmm quite yummy! The filling is moist enough to enhance the bread around and somehow it tastes a bit Asian although there is no reason for that. I really do like them! Good choice Lien!! 
Next time -and there will be a next time because the man loved these- I will use a bit more filling per bun

If you would like to be a Bread Baking Buddy (and I know you will!) please contact Lien. This is what she tells us she needs from you:

It would be great if you could join this challenge, get all tropical, knead, post and let us know how it went. And join us as a Bread Baking Buddy, send your results and what you thought of this to the Kitchen of the Month (that's Lien this time!) type BBB Coconut Rolls as subject to notitievanlien(at)gmail(dot) com and you'll be send a Bread Baking Buddy Badge that you can add to your blogpost if you like. Deadline the 29th of September. Take on the challenge and let's bake!


Saturday, June 18, 2016

Bread Baking Babes bake bran!


This past few weeks took us from happy to sad. Husband and I had two wonderful weeks together in Denmark, to return and find a dear friend passed away. Yesterday the group of friends from 40 years gathered to say goodbye, sharing tears, stories and laughter.


And yes. There was bread to be baked. Life as it is, sadness, goodness, nourishment.

Although according to two of the guys here they would gladly wait for something else to come by. The other two didn't even try...
Lien as our Kitchen of the Month chose for us to bake an incredibly healthy whole wheat bread with added bran!! So... how whole can you go I ask you?

Turns out you can add pretty much bran to the already whole wheaty goodness without baking a brick. Lien warned us that this bread asked for our Baker's savy-ness in terms of adding water, feeling the dough, timing the proofing and baking.

I only bought my bran Friday, somehow I kept forgetting to bring it from the store. For the whole wheat flour I used the Graham Flour bought in Denmark which I believed to be a coarser whole meal but I found it quite soft.... so... I added a part of the coarser whole wheat already in the house.

In pictures:
 I added 75 grams of bran!!


I didn't soak the bran, did soak the raisins but didn't soak the walnuts (soaking nuts? really?). I pretty much dumped it all in together and added raisins and nuts at the last minute. Water... I used loads of water! Initially "just" 340 gram but added more while kneading because I thought I was making Play-Doh.

Strange enough this dough rose beautifully although it felt like coarse sand held together by Jello. So onwards I went. Shaping the dough into a log and using a bread pan to rise. I thought it had a nice dome pretty quickly and decided to bake. Well... I might have turned the oven up too high for too long. No ovenspring which I did expect to be honest because the second rise went so well. The bread stayed pretty much as it was when it went into the oven. The resulting loaf looking quite nice and promising but so heavy in the hand.
I was a bit worried.


Resulting slices of bread looking promising but dismissed by the husband as bread you have to work too hard on. I tried a toasted slice this morning and I must say I was surprised. It's a nice bread, granted, a little dense and heavy but as toast? Really really nice!

The recipe is to be found here in English as well as in here in Dutch!

If you would like to be a Bread Baking Buddy (and I know you will!) please contact Lien. This is what she tells us she needs from you:

It would be great if you could join this challenge, how much bran can you add to still make good edible bread?  Get your bag of bran, knead, post and let us know how it went. And join us as a Bread Baking Buddy, send you results and what you thought of this to the Kitchen of the Month (that's me this time!) type BBB Brab Bread as subject to notitievanlien(at)gmail(dot) com and you'll be send a Bread Baking Buddy Badge that you can add to your blogpost if you like. Deadline the 29th of June. Take on the challenge and let's bake!


Saturday, April 16, 2016

Wacky Bread Baking Babes: "This is not a cinnamon roll" rolls


Driven by the question what the heck three different leavening agents are doing in this recipe. I think between the Babes we should be able to come up with an explanation. The first time I baked this particular recipe was a long-distance bake-together with my sis on a Sunday morning. She found the recipe on a blog, I googled a bit and found that it was remarkably similar to the Pioneer Woman recipe. I was surprised by the lightness of these rolls and intrigued by the recipe ingredients.
So that's the thing behind the recipe.

Then, there's wacky. Wacky because of the above but also.... Let's try to make it different. Let's NOT use cinnamon. Let's say cinnamon is verboten!
So if you were tempted by a bialys recipe....make bialys rolls. Or make bacon and cheese rolls. Orange pudding rolls? Lemon curd? Pizza?


On to the recipe then:

"This is not a cinnamon roll"- rolls

(free after ceci n'est pas une pipe)


The ingredients:

480 ml  [2 cups] milk
120 ml [1/2 cup] vegetable oil (first time I used 60 gr butter instead of oil)
95 gr [1/2 cup] sugar (depending on the flavor you make)
2 to 2.1/2 tsp yeast
520 gr [4 cups] AP flour
65 gr [1/2 cup] AP flour (extra, reserve to add later)
1/2 tsp heaping baking powder
1/2 tsp scant baking soda
1/2 tBs [9 gr] salt
melted butter
190 gr [1 cup] sugar (depending on the flavor you make)

Oven: 375F / 190 C

The original recipe starts with heating milk/oil/sugar to just below a boil and let this cool. I never do that, didn't do it this time. Also, the recipe tells you to sprinkle on the yeast and let it sit for a minute to bloom. I never do that... didn't do it this time.

Basically this recipe follows the rules for making rolls, as in: make the dough, bulk rise. Roll out in a rectangle, add filling of your choice, roll up from the long side and cut into slices. Proof and bake in a moderate oven.

Now the difference lies in the leavening combo and that comes to show in the rising method.

So:

Room temperature milk, vegetable oil, sugar and yeast in a bowl.
Add 4 cups of ap flour. Stir until combined, cover and let rise for 1 hour. Mine looked like this, sturdier than I expected but I couldn't bear to use all of that 120ml oil... I used 75.


Next, remove the cover and add baking powder, baking soda, salt and the remaining 1.2 cup of flour. Stir thoroughly to combine. Below mine, ready for the fridge. Plan to leave it in for 1 hour or so.


You may now proceed to roll out the dough in a rectangle or refrigerate for at least an hour or up to 3 days. (Probably need to keep an eye out for overflowing dough, so punch down if it rises to the top). Relatively slack dough so it definitely is easier to work with when chilled!

Proceed as you will with any other rolls you make; roll dough into a large rectangle on a floured surface. Original states to roll thin, I rolled my usual thickness. Use whatever you feel comfortable with. Although I can imagine that a slacker dough might need to be rolled thinner?

To make the filling, use your imagination... go sweet, go savory, go wacky but don't use cinnamon as your main flavor!!. Make it yours and make it good!

Now you are probably ready to start rolling, I always start with the long side closest to me and roll away from my body. You could do it the other way round, I am easy like that! Just keep a tight roll.
Once you have your roll, pinch the seam and roll it once over so the seam is on the bottom. Slice into 1.1/2 inch thick slices. Cover and set aside to rise for at least 20-45 minutes before baking.

Bake for 15-18 minutes in a preheated oven (375F/190C)


This is it!

I would love for you to make the rolls your own. Surprise us with your imagination. What I also would like to know... why the leavening? Why not use just yeast, or only the other two?
So yes, you need to use all three in this recipe, let's find out!

There already are discussions on eg the Fresh loaf about this:
Yeast is a living organism which produces Carbon dioxide and alcohol as it breaks down sugar. When the sugar has been exhausted, this action will stop. Also, if the temperature is high, the yeast will be killed. Some receipes [...] use the help of baking powder to supplement the leavening action. This way, you have the benefit of the yeast flavour (and whatever leavening the yeast achieved) and the leavening action of baking powder under baking temperature. Naturally, you don't want to use too much baking powder so as not to compromise the yeast flavour. Basically, yeast leavens the dough before baking, while baking powder leavens it during baking.
-Devanne, Why Baking Soda in Yeast Bread? The Fresh Loafhttp://www.thefreshloaf.com/node/4571/why-baking-soda-yeast-bread

 And what did I do with the filling??

- My first batch was as is cinnamon rolls.
- Second batch, filling pictured above, was cream cheese, lemon zest and juice and a bit of custard powder to thicken. Lots of ground vanilla as well.... They were very airy and light, creamy and bursting with flavor. However they stayed quite pale, maybe the cream cheese did that.

- Third batch best batch? YES! My filling consisted of.... hold on to your coffees girls....
 
spring onions, finely chopped
sundried tomatoes in oil, finely chopped (used some of the oil as well)
crumbled feta cheese (about 150 grams)
chopped walnuts sprinkled on
balsamic vinegar syrup drizzled on top

Absolutely wonderful!


I'd love to hear and see the filling you come up with. Remember, use all three leavening agents and do NOT use cinnamon as your main flavor. (I can tolerate a pinch ;-))

Though the Bread Baking Babes (BBB) is a closed group, you can bake with us as a Bread Baking Buddy every month and here’s how it works.

I am your host this month. Bake these "Not-a-cinnamon-roll rolls" according to the recipe above and post it on your blog before the 30th of this month. Please make sure you mention BBB April 2016 in the subject line and link to this BBB post in your own blog post. If you don't have a blog do not hesitate to bake and email me at bakemyday at gmail dot com with your name, a 500px wide image of your bread and the link to your BBB post. I will then send you a BBB badge for this bread that you can then add to your post on your blog. The round up can be expected around the 2nd of May. 



Wednesday, March 16, 2016

BBB March 2016: Auberge Walnut bread


Oh girls all around, are you in for a treat this month! Elizabeth as our Kitchen of the Month came across the most wonderful book in her inlaws kitchen, plucked it from the shelf and couldn't stop reading. She is not the first to recognize the enticing stories and recipes in it; David Lebovitz sang the praise here.

The book is called Auberge of the Flowering Hearth..(charming title already) in which the almost blind author spins a tale of an auberge in the French Alps, where the cooking and living follows the seasons, and the hospitality of the two female owners. The recipe Elizabeth chose to make is a walnut bread, checked against Carol Field's Italian Baker.


On to the recipe then. Please make sure this one is on your list, it will be on mine from here on. (In fact the husband asked me to immediately write down what kind of evil I did to the recipe this time because he just loved the bread!)

Oh and per Elizabeth's suggestion... do toast the walnuts! Toast some more because if you are like me you need the extra to snack on.

makes 2 loaves
Dough
  • 253g walnut halves, divided
       » 200g (2 c) whole walnut halves (I added just 100g)
       » 53g (0.66 c) walnut halves, finely chopped
  • 420g (1.75 c) boiling water
  • 34g (0.5c) skim milk powder
  • 36g (2.5 Tbsp) unsalted butter
  • 12g kosher salt (2 tsp table salt)
  • 0.5g (0.25 tsp) powdered ginger
  • 84g (4 Tbsp) dark honey (I ran out of honey so used a combination of honey and treacle)
  • 634g (~5c) flour
       » 250g unbleached all-purpose flour
       » 9g vital wheat gluten (
    didn't have any, didn't add)
       » 15g flax seed, finely ground (added two tbs whole flax seed)
       » 360g whole wheat flour
  • 29g (0.25 c) wheat germ (didn't have any, didn't add)
  • 60g (0.25 c) water at ~98F (didn't add)
  • 6g (2 tsp) active dry yeast
  • milk or cream for brushing during baking (de Groot’s recipe calls for egg-yolk and milk) (I used milk on one)
  • [I added 1 tbs sesame seeds and 2 heaped tbs sunflower seeds]
  • Toasted the seeds and walnuts in a dry skillet
  1. Walnuts: In the morning of the day you plan to bake the bread, spread the walnut halves in a single layer on a cookie sheet and toast them in a 400F oven for 8-10 minutes. Watch them carefully so they don’t burn! They’re done just at the moment you begin to smell them. Set aside 200g (2 c) onto a plate to cool. Using a very sharp knife, finely chop the other 53g to produce about 2/3 cup.
  2. Mixing the dough: Pour just-boiled water into a large mixing bowl. Whisk in milk powder. Immediately add butter, honey, salt and powdered ginger and whisk until the butter has melted and the honey is incorporated.
  3. Add flours, wheat germ and finely chopped walnuts (de Groot suggests grating them(!)) on top of one side of the large bowl.
  4. Warm the water for rehydrating the yeast to around 98F, a little over body temperature. Or are you allergic to a thermometer? Heat it until it’s the temperature safe to feed to a baby: a few drops on the inside of your wrist feels warm but not hot. If it’s too hot, add cold water. (Tap water is okay, but pleasedo NOT use water from the hot-water tap! You don’t know how long things other than water have been festering in the bottom of that tank.) Pour the warmed water into a small bowl and add the yeast. Whisk until the yeast has dissolved. Check to make sure that the milk mixture is not above body temperature (do the baby-bottle test on the inside of your wrist again) and then add the yeasted water to the milk mixture. Stir everything together with a wooden spoon to created a rough dough.
  5. Kneading: Knead in the bowl (or use your electric mixer’s instructions for kneading) until the dough is smooth, “elastic and no longer sticky”.
  6. Proofing: Cover the bowl with a plate and allow to proof in a draft-free area (oven with only the light turned on is ideal) until the dough has doubled.
  7. Prepare the pans: Cover cookie sheets with parchment paper.
  8. Walnuts and Shaping: Turn dough out onto a lightly floured board and divide in two. Roll each piece into a ball. Cover with a clean tea towel and allow to rest for 20 minutes. After their rest, flatten each ball into a disc and even divide the rest of the walnut halves on top, “pressing the nuts in slightly”, then roll each piece of dough to form a log. Joining the ends to make a ring, place each log seam side down on the parchment paper. Cover with a tea towel and allow to rise in a draft-free area until the rings have almost doubled.
  9. Baking: Preheat oven to 375F. Just before putting the bread in the oven, spray the tops liberally with water. Put the bread into the oven and immediately turn the thermostat down to 350F. After 35 minutes, brush the tops of the loaves with milk or cream (de Groot suggests using an egg-yolk whisked with milk to create this glaze) and continue baking for about 10 more minutes until the loaves are nicely browned and have reached an internal temperature between 200F and 210F (the bread sounds hollow when knuckle-rapped on the bottom). Remove the bread from the oven. Don’t even think about touching that knife!!
  10. Cooling and Finishing: Allow the bread to completely cool on a footed rack before cutting into it. It’s still baking inside! Of course you may want to serve warm bread: reheat it after it has cooled completely. To reheat and/or rejuvenate UNsliced bread, turn the oven to 400F for 5 minutes or so. Turn the oven OFF. Put the bread in the hot oven for ten minutes.
My notes:

- I accidentally switched the amounts of ww and white... oops
- I added caramel coloring because it was there for me to add (bought in Vermont's King Arthur Flour's shop!)
- I completely forgot to fold more walnuts in the dough, nor did I put any on top. Next time I will!


This kind of bread reminds me why I bake bread. It smells wonderful, lovely thin crispy crust, very flavorful. You just need butter. Or soup. Or thin slices of dry cured ham.

Or like I did this morning with the heel of the bread a small wedge of left over french cheese.

We had one of the loaves for dinner last night, with mustard mushroom cream soup and a roasted zucchini/egg plant salad. Yum!


Though the Bread Baking Babes (BBB) is a closed group, you can bake with us as a Bread Baking Buddy every month and here’s how it works.

Elizabeth is your host this month. Bake this Auberge Walnut Bread according to the recipe and post it on your blog before the 29th of this month. Please make sure you mention BBB March 2016 in the subject line and link to this BBB post in your own blog post. If you don't have a blog do not hesitate to bake and email Elizabeth with a pic and your experience. 

Details re email over on Elizabeth's blog, scroll down for all the info you need to become a Buddy Baker and receive your Buddy Badge! She will then send you a BBB badge for this bread that you can then add to your post on your blog.