Showing posts with label Appetizers. Show all posts

Saturday, April 16, 2016

Wacky Bread Baking Babes: "This is not a cinnamon roll" rolls


Driven by the question what the heck three different leavening agents are doing in this recipe. I think between the Babes we should be able to come up with an explanation. The first time I baked this particular recipe was a long-distance bake-together with my sis on a Sunday morning. She found the recipe on a blog, I googled a bit and found that it was remarkably similar to the Pioneer Woman recipe. I was surprised by the lightness of these rolls and intrigued by the recipe ingredients.
So that's the thing behind the recipe.

Then, there's wacky. Wacky because of the above but also.... Let's try to make it different. Let's NOT use cinnamon. Let's say cinnamon is verboten!
So if you were tempted by a bialys recipe....make bialys rolls. Or make bacon and cheese rolls. Orange pudding rolls? Lemon curd? Pizza?


On to the recipe then:

"This is not a cinnamon roll"- rolls

(free after ceci n'est pas une pipe)


The ingredients:

480 ml  [2 cups] milk
120 ml [1/2 cup] vegetable oil (first time I used 60 gr butter instead of oil)
95 gr [1/2 cup] sugar (depending on the flavor you make)
2 to 2.1/2 tsp yeast
520 gr [4 cups] AP flour
65 gr [1/2 cup] AP flour (extra, reserve to add later)
1/2 tsp heaping baking powder
1/2 tsp scant baking soda
1/2 tBs [9 gr] salt
melted butter
190 gr [1 cup] sugar (depending on the flavor you make)

Oven: 375F / 190 C

The original recipe starts with heating milk/oil/sugar to just below a boil and let this cool. I never do that, didn't do it this time. Also, the recipe tells you to sprinkle on the yeast and let it sit for a minute to bloom. I never do that... didn't do it this time.

Basically this recipe follows the rules for making rolls, as in: make the dough, bulk rise. Roll out in a rectangle, add filling of your choice, roll up from the long side and cut into slices. Proof and bake in a moderate oven.

Now the difference lies in the leavening combo and that comes to show in the rising method.

So:

Room temperature milk, vegetable oil, sugar and yeast in a bowl.
Add 4 cups of ap flour. Stir until combined, cover and let rise for 1 hour. Mine looked like this, sturdier than I expected but I couldn't bear to use all of that 120ml oil... I used 75.


Next, remove the cover and add baking powder, baking soda, salt and the remaining 1.2 cup of flour. Stir thoroughly to combine. Below mine, ready for the fridge. Plan to leave it in for 1 hour or so.


You may now proceed to roll out the dough in a rectangle or refrigerate for at least an hour or up to 3 days. (Probably need to keep an eye out for overflowing dough, so punch down if it rises to the top). Relatively slack dough so it definitely is easier to work with when chilled!

Proceed as you will with any other rolls you make; roll dough into a large rectangle on a floured surface. Original states to roll thin, I rolled my usual thickness. Use whatever you feel comfortable with. Although I can imagine that a slacker dough might need to be rolled thinner?

To make the filling, use your imagination... go sweet, go savory, go wacky but don't use cinnamon as your main flavor!!. Make it yours and make it good!

Now you are probably ready to start rolling, I always start with the long side closest to me and roll away from my body. You could do it the other way round, I am easy like that! Just keep a tight roll.
Once you have your roll, pinch the seam and roll it once over so the seam is on the bottom. Slice into 1.1/2 inch thick slices. Cover and set aside to rise for at least 20-45 minutes before baking.

Bake for 15-18 minutes in a preheated oven (375F/190C)


This is it!

I would love for you to make the rolls your own. Surprise us with your imagination. What I also would like to know... why the leavening? Why not use just yeast, or only the other two?
So yes, you need to use all three in this recipe, let's find out!

There already are discussions on eg the Fresh loaf about this:
Yeast is a living organism which produces Carbon dioxide and alcohol as it breaks down sugar. When the sugar has been exhausted, this action will stop. Also, if the temperature is high, the yeast will be killed. Some receipes [...] use the help of baking powder to supplement the leavening action. This way, you have the benefit of the yeast flavour (and whatever leavening the yeast achieved) and the leavening action of baking powder under baking temperature. Naturally, you don't want to use too much baking powder so as not to compromise the yeast flavour. Basically, yeast leavens the dough before baking, while baking powder leavens it during baking.
-Devanne, Why Baking Soda in Yeast Bread? The Fresh Loafhttp://www.thefreshloaf.com/node/4571/why-baking-soda-yeast-bread

 And what did I do with the filling??

- My first batch was as is cinnamon rolls.
- Second batch, filling pictured above, was cream cheese, lemon zest and juice and a bit of custard powder to thicken. Lots of ground vanilla as well.... They were very airy and light, creamy and bursting with flavor. However they stayed quite pale, maybe the cream cheese did that.

- Third batch best batch? YES! My filling consisted of.... hold on to your coffees girls....
 
spring onions, finely chopped
sundried tomatoes in oil, finely chopped (used some of the oil as well)
crumbled feta cheese (about 150 grams)
chopped walnuts sprinkled on
balsamic vinegar syrup drizzled on top

Absolutely wonderful!


I'd love to hear and see the filling you come up with. Remember, use all three leavening agents and do NOT use cinnamon as your main flavor. (I can tolerate a pinch ;-))

Though the Bread Baking Babes (BBB) is a closed group, you can bake with us as a Bread Baking Buddy every month and here’s how it works.

I am your host this month. Bake these "Not-a-cinnamon-roll rolls" according to the recipe above and post it on your blog before the 30th of this month. Please make sure you mention BBB April 2016 in the subject line and link to this BBB post in your own blog post. If you don't have a blog do not hesitate to bake and email me at bakemyday at gmail dot com with your name, a 500px wide image of your bread and the link to your BBB post. I will then send you a BBB badge for this bread that you can then add to your post on your blog. The round up can be expected around the 2nd of May. 


Sunday, January 17, 2016

Bread Baking Babes rock the boat: Adjaruli Khachapuri!


This month was a very nice one to ease us into our ninth year (can you believe that??). This January our Kitchen of the Month resided with Aparna and she baked us Adjaruli Khachapuri in her Diverse Kitchen!

Don't shy away from that intricate name thinking that this is an intricate bread to bake. None of that. It is easy but so much fun to bake and a true showboat on your dinner table. My boys send me happy smiles when they saw what I was making: "that for dinner tonight Mom? Great".

Aparna tells us the following about this bread:

Acharuli/ Adjaruli Khachapuri is a boat shaped bread from Georgia, that has melted salty cheese and a soft cooked egg or sometimes two in the middle hollow part of the “boat”. The name Khachapuri has its origins in the words “Khacho ” meaning cottage cheese / cheese curd” and “Puri” meaning bread. I believe the Georgians often eat this very popular bread as a snack or for lunch.
Some people like to call the Acharuli Khachapuri a Georgian Pizza Pie, but I think that’s insulting both the Pizza and the Khachapuri. 
There are similarities but they’re really two distinctly individual dishes to my mind. Khachapuri is considered one of Georgia’s national dishes and each region of Georgia apparently makes its own variety of it. So much so that the Tbilisi State University supposedly developed a “Khachapuri Index” to measure inflation based on how much it costs to make one Imeretian Khachapuri!


So... onto the recipe:

Dough:
1 tsp instant yeast
1/2 tsp sugar
145 g milk
1 tbsp. olive oil
1 egg (small or half a large egg) I didn't use the egg in the dough
245 g flour, plus more for dusting
½ tsp salt

Filling:
125 g grated/shredded Mozzarella (I used several Dutch cheeses)
125 g crumbled feta cheese
a pinch of dried oregano and black pepper
topping of choice  - I am going to use tomato and egg

Put all the ingredients for the dough into the mixing bowl of the standmixerl and knead together until everything comes together into a smooth and somewhat loose elastic dough that’s just short of sticky. Transfer the ball of dough to a well-oiled bowl, turning it so it is coated all over. Loosely cover and let it rise till double in volume – about 1 to 1 1/2 hours.
Place a pizza stone, or a baking sheet on a rack in lower third of oven. 

Preheat oven to 250ºC.

Combine the cheeses in a bowl and  set aside. Deflate the dough and divide it into two halves. Working with one piece at a time,  roll it out to a rectangle about 25 cm long and 3 mm thick on a piece of lightly floured parchment.  This makes it easier to transfer the dough to your baking sheet.

Roll the long sides in a bit curving them inwards at the ends and seal well (with a little water) or the edges will open up during baking. Then bring the edges close and pinch together on both ends to form a “boat” like shape.
Again, make sure the ends are sealed well. Transfer the “boats” to the baking sheet, but if you’re going to bake them directly on the pizza stone just omit this step.

Fill the centre “well” area with half of the cheese mixture so it is a little higher than the edges of the dough “boat”. Repeat with the other half of dough and  bake them for about 12 to 15 minutes until the Khachapuri are golden brown. Take the breads out of the oven and add the sliced tomatoes and return them to the oven. Bake for another 3 to 4 minutes.

Take the Adjaruli Khachapuri out, and serve them hot. It helps to wait for about 10 minutes before eating them so you don’t burn your mouth!


The Khachapuri in this post is known as Acharuli/ Adjaruli Khachapuri as it comes from Adjara (Achara), the mountain region of Georgia's Black Sea coast which is known for its dairy products. In Georgia, this bread is often filled with a cheese called “Sulguni” which is a salty sheep’s milk cheese or Imeretian cheese, or a blend of both.

Mine are still a bit naked, I baked them and will reheat with egg and tomato tonight for dinner! Can't wait..

Though the Bread Baking Babes (BBB) is a closed group, you can still bake with us as a Bread Baking Buddy every month and here’s how it works.
Aparna is your host this month. Bake this Acharuli/ Adjaruli Khachapuri  according to the above recipe and post it on your blog before the 28th of this month. Please make sure you mention the Bread Baking Babes and link to this BBB post in your own blog post.

Then e-mail Aparna at aparna[AT]mydiversekitchen[DOT]com with your name, a 500px wide image of your bread and the link to your BBB post. She will then send you a BBB badge for this bread that you can then add to your post on your blog. At the end of the month Aparna will make a beautiful round up mentioning all our Buddies!!


Tuesday, October 15, 2013

Pie by Dean Brettschneider (review and a discount!)


There's a new-to-me book on my counter, on my sofa, the dining table, the bedstand.. in fact in the first week it arrived I took it everywhere to read and to look at the pictures.. Seriously can there be anything more enticing for a savoury girl than pictures of pie? Crisp and flaky, golden hued pie in every shape and flavour.

"Pie" by Dean Brettschneider (Jacqui Small Publishers) features a collection of over 80 pies both savoury and sweet in all shapes and sizes.
"Dean Brettschneider is a global-based professional baker and pâtissier with an
international following. Award-winning author of eleven cookbooks, Global Baker –
Dean Brettschneider co owns the successful artisan bakeries Baker & Cook in Singapore
and has bakery interests in Shanghai, Hangzhou, Auckland and later this year in Abu
Dhabi, Manila, Tokyo & Kuala Lumpur".
The book is well laid out with chapters as Meat, Seafood, Vegetarian and Sweet pies (even something that's called "not-quite-a-pie, in which eg. cornish pastries, sausage rolls and flammkuchen are introduced). There's quite an extensive introduction of the history of pies (which sounds like something Monty Python could have done), ingredients and equipment.
The basic recipes for the pastries are grouped together in the back of the book. There are inviting pictures of almost every recipe; lovely, rustic and edible pictures that manage to at the same time lure you in and not scare you. You know where you page through a book and think oh my that is just gorgeous but I can 't do it? Pictures here are equally gorgeous and still make you feel you can do it yourself. I like that!


First of all, ingredients are in weight! Grams, ml and spoons!! One would expect this would be common practice especially in baking books but it still isn't. So yes, I am happy. Furthermore I really appreciate the fact that there are individual pies as well as family sized ones, with ingredients that are easily available around the globe. As I said, inviting and doable.
Loads of pictures to be found in the "Basic Recipe" section as well, helping you along to get the best puff pastry you can make, how to bake blind and topping your pastry. Very helpful for the first timer as well as the experienced baker. The only thing I would like to see is a time schedule; preparation time, cooking time, waiting time. I missed that.

Now what did I try?
The family really really wanted me to make the "Bacon, Curried Egg and Ricotta Pie".... I chose to bake the "Sweet 'n' Spicy Veal, Pork and Macadamia Nut tart" (sans nuts because I forgot to buy them :-()). Serving 8 people? Family of 5 liked it so much they left only 1 slice.... and didn't touch the green salad I made to go with it!


Fennel Pastry
2 tbsp fennel seeds
160gr standard plain flour
120gr butter
good pinch of salt
50 ml cold water

(prepare: 10 minutes. waiting time 30 minutes or overnight. Pre bake 20 minutes. Waiting time 30 minutes) 

Place fennel seeds in a pestle and mortar and grind to a rough powder, ensuring that it's not too fine. Set aside. Place flour, fennel seeds, butter and salt into a large mixing bowl. Using your fingertips, gently rub ingredients together until they resemble rough breadcrumbs. Do not overmix otherwise butter will begin to melt from the heat of your fingers.

Add water and mix until a dough is formed. Cover with clingfilm and refrigerate for 30 minutes of overnight. Gently re-work pastry before using, taking care to ensure it remains cold and firm.
On a lightly floured surface, roll out pastry as stated in your recipe.

(line tin with rolled dough, trim edges and refrigerate for 1 hour. Line with aluminum foil and bake blind for 10 minutes in a preheated 180C oven. Remove foil and weights and bake until dry and crisp (10 minutes) Transfer to a rack and cool completely, about 30 minutes).

We were so enamored with the pastry! I am not scared by pastry dough anymore but I still find it a tricky thing.... this pastry? Even the kids commented on how flaky it was and maybe I could use this pastry to make sausage rolls as well? The filling was a surprising combination, there's a lot going on in this filling but the parts do make a whole in this case.

Then I baked the "Rhubarb, Blueberry and Strawberry Shortcake Pie" because the shortcake thing peeked my curiosity and it seemed like a quick little number.
Since this isn't rhubarb season anymore I used fresh raspberries and strawberries along with frozen blueberries and substituted some sauteed apple pieces for the rhubarb.

This is a real good one! Not overly sweet, fresh and lovely. The filling stays soft-ish and gooey, the shortcake is sturdy enough to take along on a visit, great to slice but still melt in your mouth.
Now I need to conquer making puff pastry from scratch.... several recipes in the book. I trust I will find time and courage in the next weeks. Will let you know!

We're hooked on this book. They've been begging me for that "breakfast for dinner" pie since a week.

If you would like your own copy (oh yes you do!) below is what the publisher set up for my readers:

To order Pie at the discounted price of 23.58€ including p&p* (RRP: 29.47€), telephone 01903 828503 or email mailorders@lbsltd.co.uk and quote the offer code APG18. 

Alternatively, send a cheque made payable to: 
Littlehampton Book Services Mail Order Department, 
Littlehampton Book Services, 
PO Box 4264, 
Worthing, West Sussex 
BN13 3RB. 
Please quote the offer code APG18 and include your name and address details. 

*UK ONLY - Please add 2.95€ if ordering from overseas.


Happy Baking!

Monday, June 03, 2013

ABC Cheese and Herbs Yoghurt scones !

BLOG 198

In the month of June (June already!! And we haven’t had one summery day yet!) we’re baking from the King Arthur website and tune in to a recipe for savory scones. The original recipe calls them Bacon Cheddar Chive scones. Sounds good right? ABC Bakers have been baking scones before, sweet orange and vanilla flavoured scones from Abby Dodge's book The Weekend Baker. This time we’re looking at the savory side of things, adding cheese and green herbs instead. (and bacon!! there’s bacon in the original recipe!)

Just to show you that for some things I’ve come a long way; here’s another post,  where I state that I don’t understand “ this “ dough! That was way back in 2006 and I clearly learned a couple of things along the way… scone dough does not scare me anymore. Sometimes you just need to see how it is supposed to be. Here’s another example: for years I’ve declared that I couldn’t roll out dough. Until I actually saw someone “lightly flour the countertop”. Wow. Lightly flouring got a whole different meaning. And I can roll out dough since!

BLOG 197

Cheese and green herbs Yoghurt scones

(adapted from a King Arthur Flour recipe)

Ingredients:


  • 2 cups (8 1/2 ounces)  All-Purpose Flour
  • 3/4 teaspoon salt (Original uses 1 teaspoon which I think was too much)
  • 2 teaspoon baking powder (I think I actually used just 1 and forgot to add the second….but not sure of it though.)
  • 1/2 teaspoon baking soda
  • 2 teaspoons sugar
  • 4 tablespoons (1/2 stick, 2 ounces) cold unsalted butter
  • 1 cup grated Gouda cheese
  • snipped spring onion
  • snipped fresh chives
  • snipped fresh oregano     -----> all herbs combined makes about 1/2 cup
  • snipped fresh flat parsil
  • 1/2 cup skimmed milk + 2 tbs for brushing (which I forgot)
  • 1/4 cup yoghurt

So where is the bacon you ask? Ehm not here, not this time in this recipe. Didn’t have any and decided to let the herbs shine so here we are!

How to:

Preheat the oven to 425°F.

My convection oven was at 200C, and I baked my mini-ones for 20 minutes. Plenty brown and plenty done!

Lightly grease a baking sheet, or line it with parchment.

I used my Magimix to mix the dough.

First I combined flour, salt, baking powder, baking soda and sugar and pulsed to combine.
Then I added the butter in chunks and pulsed some more until the mixture is crumbly.
Transfer to a big bowl and stir in cheese and herbs with a fork until evenly distributed.
Stir together milk and yoghurt and add to the flour. Stir to combine.
Try squeezing the dough together; if it’s crumbly and won’t hang together, or if there are crumbs remaining in the bottom of the bowl, add cream until the dough comes together. Transfer the shaggy dough to a well-floured work surface.

I made mini-scones: Divide the dough in half, and roll each half into a 5" round. Cut each round into 8 wedges. Bake in a preheated 425°F oven till golden brown, 18 to 20 minutes; (or for about 25 minutes if frozen).

BLOG 195For bigger ones:
5) Pat the dough into a smooth 7" disk about ¾" thick. Transfer the disk to the prepared baking sheet.
6) Use a knife or bench knife to cut the disk into 8 wedges, spreading the wedges apart a bit on the pan.
7) Brush the scones with a bit of cream; this will help their crust brown.
8) Bake the scones for 22 to 24 minutes, until they’re golden brown. Remove them from the oven, and cool right on the pan. Serve warm, or at room temperature.
Yield: 8 large scones
Baker's tips
•Want to make scones now, freeze and bake later? Make scones up to the point they're on the baking sheet, cut and ready to bake; don't brush them with cream. Freeze, then remove from the sheet, and wrap airtight in a plastic bag. When you're ready to bake, remove however many you want to bake from the freezer, place on a baking sheet, brush with cream, and bake in a preheated 425°F oven for 35 to 40 minutes, until golden brown.

Anyone that hesitates to make scones can look at the Bakers Banter site recipe where there are additional step by step pictures. Very helpful to see how moist your dough can be.


BLOG 200My notes:

- Absolutely delicious!!  I never missed the bacon! With the herbs and the cheese there’s enough flavor going on. I will try and reduce salt the next time because I found them too salty now. Especially when you are going to use bacon you will want to reduce the added salt I think, so keep that in mind.

- These most certainly are going in the keeper-book. So easy to make and bake. Easy to make different flavors as well.

- I was surprised how very airy, fluffy and light these were! 


If you'd like to join the ABC bakers in their monthly baking adventures, please go to the ABC blog for more information. If you like to check out what the other ABC Bakers thought of these scones, please click here to find out.

Saturday, March 26, 2011

Turkish Feta And Spinach filled filo pastry

IMG_3454 

It’s been a while since I made these and I didn’t want to post because of the lack of better pictures. See, I made them spur-of–the moment while cooking dinner and it was already dark when they were out of the oven.

No real recipe either but you can find similar pastries on the Internet.

I used:

450 gr frozen spinach squeezed dry
1 egg
300-400 gr feta cheese, crumbled
pepper, salt, thyme
couple of dried tomatoes, chopped
1/2 tsp chili pepper (Aleppo)
1 tbs lemon juice
1/4 cup dried breadcrumbs

1 package ready made filo pastry, I think it was 750 grams. I got mine from the Turkish shop, sealed and chilled but not frozen. (I hate frozen filo pastry, the ones I get are either dried out at the edges or clinging together, this one was great to work with).

Mix all the ingredients for the filling, The egg is there to keep it all together, and I included the breadcrumbs to make sure if there was any liquid left in the spinach it was taken care of. Would have used fresh but frozen was what I had on hand.

The process of the triangle fold was a pleasure once I had it down to a routine. My filo dough came in long rectangles and I sliced them lenghtwise in three equal strips. Proceeded to brush half of each strip with melted butter (lengthwise) and folded the unbrushed part over the buttered part. This left me with one long narrow strip.
Placing a tablespoon of the filling on the bottom left hand side of the strip it was a matter of fold over, aligning the edges as I go. Flop, flop flop and ready!

This is what I did. Mind! These are not my pictures, they are from here! And there’s a written instruction as well.

Thursday, December 16, 2010

Updated Italian Bagels? Taralli Pugliesi for the Bread Baking Babes


There we go.. our final recipe in 2010 brings us to Italy. Ilva invited us in her kitchen and shared an authentic Apulian (or Puglia) recipe called Taralli Pugliesi.

In preparation very similar to bagels in that the shaped dough is briefly dumped in boiling water and then baked.


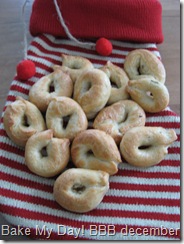
Mine are in the oven as we speak and so far I can tell you that it is far less involved than I thought!IMG_3291

So that’s good news in December. Of course I didn’t realise this AND missed that today is in effect the 16th of December so at the end of the day instead of setting our Christmas tree I am baking tarelli.

IMG_3293I have to say I again need to brush up my reading skills; while we were supposed to have a stiff but manageable dough I ended up with a lovely soft dough which I set to rise… NOT what this is about. Stiff dough, able to roll out into ropes immediately and then rest for 20 minutes! Then boil and bake. Sigh. When will I learn? That being said it was a great dough to work with, and it made my house smell lovely.

For the recipe and instructions on how to bake I gladly refer you to read more: Go over to Ilva's

So if you feel like baking Taralli  and on top of that deserve the Bread Baking Buddy Badge, bake along, blog about it and send the link to Ilva (luculliandelights AT gmail DOT com, please write Bread Baking Buddy in the subject line). Ilva will send you our Buddy Badge and include you in the Buddy roundup too! Deadline is 29th December so there’s plenty of time to bake before or after Christmas (great snack for New Years Eve!).IMG_3294

Edited for pictures and notes:

I have seen the Babes taralli and I wish mine looked so puffed and smooth! I’m not sure where the crinkly comes from, I guess their waterbath was too swift maybe.
Mine definitely needed a longer oven time than stated. They sure smell really really nice and I want to try them again with other flavors such as the peperoncino Ilva suggested. I’m afraid the fennel was a bit much for us.

Definitely a recipe to use and try more than once, possibilities!

Visit all our Babes on the left hand side!


Last, but NOT least, for the Babes THIRD anniversary in February we will be baking a bread suggested by a reader.
Dear reader, this means you!

Just send an e-mail at bakemyday (at)gmail (dot)com and, if at all possible, include the recipe in the body of the e-mail or as an attachment.

So think about it:

  • What’s your favorite bread?
  • What bread haven’t you ever been able to get to turn out the way you want?
  • What bread scares you the most?
  • What’s the bread recipe you’ve baked the most?
  • What bread do you dream about baking?
  • What bread do you…?

Scour your bread-baking cookbooks, recipe boxes and bread-baking sites to make your choice.

The bread YOU suggest might be our Anniversary recipe!!

To be continued…..


Wednesday, July 15, 2009

Bread Baking Babes: Almost Wordless Wednesday

{feta cigars}
I would have told a tale of tahini, Sukkar bi Tahin to be exact. Today is our posting day, the day Natashya invites us to join her at her Kitchen of the Month to bake sweet tahini filled swirls. Sounds good no? I thought so...
{walnut filled dates wrapped in bacon}
But today is also DH birthday. His 50th. He didn't want any 'circus'. I decided to do a little bit of juggling after all. He doesn't know. Yet. (Hi honey I hope you're busy at work scooping runny caramel custard sauce next to pillow-like brioche cake and not pay attention to my blog hehe. Have a nice day!).
{wasabi deviled eggs}
Instead of showing tahini swirls I'll show you an -almost- Wordless Wednesday, updating as I go. Please head over to Natashya to see what I should have done, don't forget to pay a visit to all my wonderful sisters in arms (knights in shining?) to see what they made (links in the side bar). I promise you, it's worth it! My swirls will follow soon.

Tuesday, June 23, 2009

Fresh Tomato Salsa on Ruby Tuesday (6)

I am sure you all have been making fresh tomato salsa since you could hold a knife, have to tell you however that this was a first for me.. (yes that's a strawberry there and I know it's not supposed to be there but let me assure you that it was a really nice addition).
The love for tomatoes came late in life for me, although my mom tried every trick in the book to let me enjoy fresh tomato; sprinkled with salt and pepper, dipped in sugar.. just didn't like them. Baked yes, grilled fine, sauce great but fresh, eaten like you would eat an apple? No thank you.

It's different now. I even make fresh tomato salsa!

fresh ripe tomatoes, diced
onion, chopped fairly small
lime juice
olive oil/lemon flavoured olive oil
pinch of cumin
cilantro (fresh or lightly roasted seeds)
salt and pepper
aleppo pepper flakes (or any fresh chili, handle with care!)

No quantities, it was an instant idea and I just went ahead with it. I added some shredded basil leaves, some fresh chopped parsley and chives, because they were there in my windowsill staring at me... oh and the ripe red strawberries of course. Just a couple, quartered.
Absolutely something to do again, so simple but good!

This is another one for Ruby Tuesday.

Tuesday, May 05, 2009

Lemon Bacardi Cordial

Simple delicious pick me up.

Lemon cordial Bacardi
1 quantity of lemon cordial, chilled
1 quantitiy of white rum
top up with carbonated water to taste
ice

I just dumped in an ice cube but if you're going to serve this at a summer party, crushed ice and a sprig of lemon balm or mint would be so festive!

Yesterday night when I tried it on a whim I had some strawberry juice left in the bowl.... added it... yum!

Friday, April 10, 2009

Dipping Diva: lemony dill feta-spread / Citroen-dille feta créme

(Nederlands? Even scrollen..)

One of my fellow Boisterous Bread Baking Babes blogged about baking our Pane Francese, the bread she showed was wonderful but the bowl in one of the pictures caught my attention. Natashya, please tell me; what's in there? Luckily for me she gave us the recipe of her feta slather at the bottom of the post. I've made it twice since I read it, and the bigger boys like it a lot! The first time I had to play around the recipe because not everything was on hand at the time. It came out as a -delicious- cross between tzatziki and her feta-slather (that slather word really says it all, it's a natural thing to do with this one!). The original recipe can be found here at Living in the Kitchen with Puppies. This is what I did the first time:


Lime-dill-cucumber feta spread

200 gr feta, cubed
1/4 cucumber, peeled, cubed
4 el olive oil
2 el lime juice
zest of half lime
2 garlic cloves

1 tbs dried dill
2 tbs fresh chives, chopped
fresh pepper & salt

Place feta, oil, garlic ,zest, juice and cucumber in the bowl of a blender (food processor) pulse until everything comes together but still has some texture. Stir in dill and chives and finish off with pepper and salt. Excellent with fresh baked crusty bread as an appetizer with drinks or with your dinner.

~~~~~~~~~~
 
Citroen-dille Feta boter:
225 gr feta, in blokjes gesneden
4 el olijfolie
2 el citroensap
rasp 1/2 citroen
1 á 2 tenen knoflook, geperst
evt. één van deze toevoegen:
{1/4 stuk komkommer, geschild in kleine blokjes} of
{1 á 2 lente-uitjes, alleen het wit/lichtgroen, kleingesneden}

3 el verse dille / 1 el gedroogde dille
2 el bieslook
peper en zout

Oh zo simpel maar zo lekker! Simpelweg alle bovenste ingrediënten in de blender (evt. keukenmachine) pulsen tot een dikke brij, niet helemaal fijnmalen, probeer nog enige structuur te houden. Dille en bieslook toevoegen en op smaak maken met peper en zout.
Heerlijk met versgebakken knapperig brood!

Saturday, September 27, 2008

Daring Bakers September: a shattering challenge!


Ding Dong! It's time for another challenge! This month the Daring Bakers were to make lavash, the challenge issued by our wonderful hosts: Natalie from Gluten A Go Go, and co-host Shel of Musings From The Fishbowl. Great to see some savoury again, even more wonderful that this recipe is easy to make gluten free or vegan. Every month there are quite some really Daring Bakers that make the challenges accomodating for their restrictions. Way to go girls!

The recipe can be found either on the hostesses blogs or in Peter Reinhards the Bread Baker's Apprentice. I remember making these crackers before but also had a faint notice that they were good but not thin enough to shatter.

This time I used a pasta machine to roll my dough as thin as I dared. Absolutely thinner than before so that part of the plan worked. Toppings were simple; bands of sesame seeds, oregano, ground spanish red pepper, coarse sea salt and cumin. Tasty if only they stayed on top of the crackers... One part of the dough was reserved for a sweet break; cinnamon and sugar.


We were also asked to make a dipping (staying vegan and/or glutenfree). I chose to make a favourite; my roasted bell pepper spread, spicy with garlic and chili's. A perfect companion for these. Another combo was made with a feisty peach chipotle jam.... Verdict: Easy to make dough, pasta roller definitely simplifies the rolling job. Would spread the dough with a bit of oil to attach the sprinkling to the top. Still, even with the herbs sprinkled a dip is needed to get some boost. I loved the variation of this challenge, (no butter, eggs and chocolate), original, versatile and diet friendly! Kudos!!

Thursday, January 17, 2008

Tzatziki; maintaining a peaceful marriage

(In het Nederlands? Even scrollen!)

DH returned late last night from a businesstrip abroad and he was very happy to be home again.....until he kissed me! After that he appeared still happy but kept his distance.
I accidently solved the Cypriotic question as well... using Turkish yoghurt in my Greek recipe.

Again: simple, versatile, very tasty -and quick!-

Recipe:
500 gr thick Greek yoghurt (or Turkish...)
5 cloves of garlic, pressed
75 ml good quality olive oil
2 tsp white wine vinegar (I used a white balsamic syrup)
1.1/2 Tbs dill
1.1/2 Tbs mint
1 ts oregano
1 cucumber, peeled, de-seeded, grated and very well drained
salt and pepper

Stir. Chill prior to serving.

That's it? yes. Frankly....yes! The hardest part is draining the cucumber (press with your hands) so it won't dillute the yoghurt too much.

As an ultimate summer dish (very nice dip for grilled dishes, either fish or meat) it's preferably made with fresh herbs but it's very good even with dried so don't let that withold you. It's essential that the yoghurt you use is very very thick, so try to find a Greek or Turkish yoghurt, you might want to try several brands.
Another option is to make drained yoghurt; leave some regular yoghurt to drain in a cloth lined sieve for several hours. Use a dampened teatowel or several layers of cheese cloth. It will loose a lot of it's liquid and the result is a very thick, almost paste-like yoghurt.

I served it with oven roasted potatoes, Turkish sausages and Italian flat beans, but you could serve it as an appetizer as they do in Greece, with some pita bread and olives, maybe add some raw sweet onion rings. A nice addition is to add some dry roasted chopped walnuts and a small spoon full honey!
Whatever you do, please do try to convince your family members -or the ones that share your bed- to try some....
Tzatziki in het Nederlands

Recept:
500 gr dikke Griekse/Turkse yoghurt
5 tenen knoflook, geperst
75 ml goede olijf olie
2 tl witte wijnazijn (ik gebruikte een witte balsamico siroop)
1.1/2 el dille
1.1/2 el munt
1 tl oregano
1 komkommer, geschild, ontdaan van zaadjes, geraspt en heel goed uitgeknepen
zout en peper

Mengen en roeren, in de koelkast om door en door koud te laten worden.

Echt, dat is alles! In Griekenland wordt dit vaak als hapje vooraf geserveerd, samen met pita brood en wat rauwe uienringen, maar ook wel als dip naast gegrilde vis of vlees. Het is trouwens ook erg lekker om er wat droog geroosterde gehakte walnoten door te roeren met een lepeltje honing. Natuurlijk kun je het beste verse kruiden gebruiken maar ook met gedroogde kruiden is het prima te maken.

Als je niet de goede dikke yoghurt kunt vinden, maak dan eens "hang-op". Laat een liter (of meer, het is ook erg lekker om zo te eten namelijk) gewone yoghurt een paar uur uitlekken in een vergiet bekleed met een paar lagen kaasdoek -of een vochtig gemaakte theedoek-. De yoghurt verliest zo een hoop van zijn vocht en wat je overhoudt is een dikke pasta. Om de wat vettere griekse/turkse yoghurt te benaderen zou je kunnen overwegen om er wat lobbig geslagen ongezoete room door te roeren.

Wat je ook doet....probeer je huis/tafelgenoten ervan te overtuigen een hapje te proberen, het zou zomaar kunnen dat ze overwegen in de logeerkamer te slapen.... enne... de volgende dag maar even geen afspraak plannen bij de tandarts!