Showing posts with label Tart/Taart/Pie. Show all posts

Sunday, January 17, 2016

Bread Baking Babes rock the boat: Adjaruli Khachapuri!


This month was a very nice one to ease us into our ninth year (can you believe that??). This January our Kitchen of the Month resided with Aparna and she baked us Adjaruli Khachapuri in her Diverse Kitchen!

Don't shy away from that intricate name thinking that this is an intricate bread to bake. None of that. It is easy but so much fun to bake and a true showboat on your dinner table. My boys send me happy smiles when they saw what I was making: "that for dinner tonight Mom? Great".

Aparna tells us the following about this bread:

Acharuli/ Adjaruli Khachapuri is a boat shaped bread from Georgia, that has melted salty cheese and a soft cooked egg or sometimes two in the middle hollow part of the “boat”. The name Khachapuri has its origins in the words “Khacho ” meaning cottage cheese / cheese curd” and “Puri” meaning bread. I believe the Georgians often eat this very popular bread as a snack or for lunch.
Some people like to call the Acharuli Khachapuri a Georgian Pizza Pie, but I think that’s insulting both the Pizza and the Khachapuri. 
There are similarities but they’re really two distinctly individual dishes to my mind. Khachapuri is considered one of Georgia’s national dishes and each region of Georgia apparently makes its own variety of it. So much so that the Tbilisi State University supposedly developed a “Khachapuri Index” to measure inflation based on how much it costs to make one Imeretian Khachapuri!


So... onto the recipe:

Dough:
1 tsp instant yeast
1/2 tsp sugar
145 g milk
1 tbsp. olive oil
1 egg (small or half a large egg) I didn't use the egg in the dough
245 g flour, plus more for dusting
½ tsp salt

Filling:
125 g grated/shredded Mozzarella (I used several Dutch cheeses)
125 g crumbled feta cheese
a pinch of dried oregano and black pepper
topping of choice  - I am going to use tomato and egg

Put all the ingredients for the dough into the mixing bowl of the standmixerl and knead together until everything comes together into a smooth and somewhat loose elastic dough that’s just short of sticky. Transfer the ball of dough to a well-oiled bowl, turning it so it is coated all over. Loosely cover and let it rise till double in volume – about 1 to 1 1/2 hours.
Place a pizza stone, or a baking sheet on a rack in lower third of oven. 

Preheat oven to 250ºC.

Combine the cheeses in a bowl and  set aside. Deflate the dough and divide it into two halves. Working with one piece at a time,  roll it out to a rectangle about 25 cm long and 3 mm thick on a piece of lightly floured parchment.  This makes it easier to transfer the dough to your baking sheet.

Roll the long sides in a bit curving them inwards at the ends and seal well (with a little water) or the edges will open up during baking. Then bring the edges close and pinch together on both ends to form a “boat” like shape.
Again, make sure the ends are sealed well. Transfer the “boats” to the baking sheet, but if you’re going to bake them directly on the pizza stone just omit this step.

Fill the centre “well” area with half of the cheese mixture so it is a little higher than the edges of the dough “boat”. Repeat with the other half of dough and  bake them for about 12 to 15 minutes until the Khachapuri are golden brown. Take the breads out of the oven and add the sliced tomatoes and return them to the oven. Bake for another 3 to 4 minutes.

Take the Adjaruli Khachapuri out, and serve them hot. It helps to wait for about 10 minutes before eating them so you don’t burn your mouth!


The Khachapuri in this post is known as Acharuli/ Adjaruli Khachapuri as it comes from Adjara (Achara), the mountain region of Georgia's Black Sea coast which is known for its dairy products. In Georgia, this bread is often filled with a cheese called “Sulguni” which is a salty sheep’s milk cheese or Imeretian cheese, or a blend of both.

Mine are still a bit naked, I baked them and will reheat with egg and tomato tonight for dinner! Can't wait..

Though the Bread Baking Babes (BBB) is a closed group, you can still bake with us as a Bread Baking Buddy every month and here’s how it works.
Aparna is your host this month. Bake this Acharuli/ Adjaruli Khachapuri  according to the above recipe and post it on your blog before the 28th of this month. Please make sure you mention the Bread Baking Babes and link to this BBB post in your own blog post.

Then e-mail Aparna at aparna[AT]mydiversekitchen[DOT]com with your name, a 500px wide image of your bread and the link to your BBB post. She will then send you a BBB badge for this bread that you can then add to your post on your blog. At the end of the month Aparna will make a beautiful round up mentioning all our Buddies!!



Monday, February 16, 2015

February celebration recipe is on!! Kouign Amann


Nous célébrons aujourd'hui le septième anniversaire…. en francais! That should say that we Babes are celebrating our 7th anniversary this month, with a French, or rather a Breton bake fest. A Brittany buttery pastry all deceptively light and fluffy and puffy, called Kouign Amann.

Lien is the Master of the Kitchen (yes she is, look at that picture above…. mouthwatering!) and she proposed to bake Kouign Amann.

Due to family circumstances I was not able to bake this month. I would love to see you hop over to my fellow Babes and celebrate with them.

The Bread Baking Babes (current dozen) are:

Would you like to be a Bread Baking Buddy? Please take a look at the instructions Lien posted for your Buddy Badge!


(yes I know…. this can be too much…. can we just share one? or two maybe?)

Tuesday, October 15, 2013

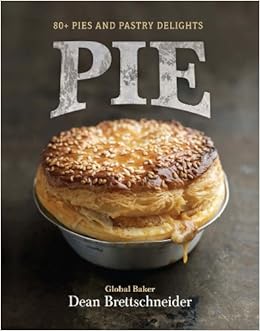
Pie by Dean Brettschneider (review and a discount!)


There's a new-to-me book on my counter, on my sofa, the dining table, the bedstand.. in fact in the first week it arrived I took it everywhere to read and to look at the pictures.. Seriously can there be anything more enticing for a savoury girl than pictures of pie? Crisp and flaky, golden hued pie in every shape and flavour.

"Pie" by Dean Brettschneider (Jacqui Small Publishers) features a collection of over 80 pies both savoury and sweet in all shapes and sizes.
"Dean Brettschneider is a global-based professional baker and pâtissier with an
international following. Award-winning author of eleven cookbooks, Global Baker –
Dean Brettschneider co owns the successful artisan bakeries Baker & Cook in Singapore
and has bakery interests in Shanghai, Hangzhou, Auckland and later this year in Abu
Dhabi, Manila, Tokyo & Kuala Lumpur".
The book is well laid out with chapters as Meat, Seafood, Vegetarian and Sweet pies (even something that's called "not-quite-a-pie, in which eg. cornish pastries, sausage rolls and flammkuchen are introduced). There's quite an extensive introduction of the history of pies (which sounds like something Monty Python could have done), ingredients and equipment.
The basic recipes for the pastries are grouped together in the back of the book. There are inviting pictures of almost every recipe; lovely, rustic and edible pictures that manage to at the same time lure you in and not scare you. You know where you page through a book and think oh my that is just gorgeous but I can 't do it? Pictures here are equally gorgeous and still make you feel you can do it yourself. I like that!


First of all, ingredients are in weight! Grams, ml and spoons!! One would expect this would be common practice especially in baking books but it still isn't. So yes, I am happy. Furthermore I really appreciate the fact that there are individual pies as well as family sized ones, with ingredients that are easily available around the globe. As I said, inviting and doable.
Loads of pictures to be found in the "Basic Recipe" section as well, helping you along to get the best puff pastry you can make, how to bake blind and topping your pastry. Very helpful for the first timer as well as the experienced baker. The only thing I would like to see is a time schedule; preparation time, cooking time, waiting time. I missed that.

Now what did I try?
The family really really wanted me to make the "Bacon, Curried Egg and Ricotta Pie".... I chose to bake the "Sweet 'n' Spicy Veal, Pork and Macadamia Nut tart" (sans nuts because I forgot to buy them :-()). Serving 8 people? Family of 5 liked it so much they left only 1 slice.... and didn't touch the green salad I made to go with it!


Fennel Pastry
2 tbsp fennel seeds
160gr standard plain flour
120gr butter
good pinch of salt
50 ml cold water

(prepare: 10 minutes. waiting time 30 minutes or overnight. Pre bake 20 minutes. Waiting time 30 minutes) 

Place fennel seeds in a pestle and mortar and grind to a rough powder, ensuring that it's not too fine. Set aside. Place flour, fennel seeds, butter and salt into a large mixing bowl. Using your fingertips, gently rub ingredients together until they resemble rough breadcrumbs. Do not overmix otherwise butter will begin to melt from the heat of your fingers.

Add water and mix until a dough is formed. Cover with clingfilm and refrigerate for 30 minutes of overnight. Gently re-work pastry before using, taking care to ensure it remains cold and firm.
On a lightly floured surface, roll out pastry as stated in your recipe.

(line tin with rolled dough, trim edges and refrigerate for 1 hour. Line with aluminum foil and bake blind for 10 minutes in a preheated 180C oven. Remove foil and weights and bake until dry and crisp (10 minutes) Transfer to a rack and cool completely, about 30 minutes).

We were so enamored with the pastry! I am not scared by pastry dough anymore but I still find it a tricky thing.... this pastry? Even the kids commented on how flaky it was and maybe I could use this pastry to make sausage rolls as well? The filling was a surprising combination, there's a lot going on in this filling but the parts do make a whole in this case.

Then I baked the "Rhubarb, Blueberry and Strawberry Shortcake Pie" because the shortcake thing peeked my curiosity and it seemed like a quick little number.
Since this isn't rhubarb season anymore I used fresh raspberries and strawberries along with frozen blueberries and substituted some sauteed apple pieces for the rhubarb.

This is a real good one! Not overly sweet, fresh and lovely. The filling stays soft-ish and gooey, the shortcake is sturdy enough to take along on a visit, great to slice but still melt in your mouth.
Now I need to conquer making puff pastry from scratch.... several recipes in the book. I trust I will find time and courage in the next weeks. Will let you know!

We're hooked on this book. They've been begging me for that "breakfast for dinner" pie since a week.

If you would like your own copy (oh yes you do!) below is what the publisher set up for my readers:

To order Pie at the discounted price of 23.58€ including p&p* (RRP: 29.47€), telephone 01903 828503 or email mailorders@lbsltd.co.uk and quote the offer code APG18. 

Alternatively, send a cheque made payable to: 
Littlehampton Book Services Mail Order Department, 
Littlehampton Book Services, 
PO Box 4264, 
Worthing, West Sussex 
BN13 3RB. 
Please quote the offer code APG18 and include your name and address details. 

*UK ONLY - Please add 2.95€ if ordering from overseas.


Happy Baking!

Wednesday, May 22, 2013

Cider Apple Pie with a woven lattice crust


Son #1 thought I’d like to sample some different ciders and brought home two different brands from his student job as “logistics bar guy” (Hmm fun job). One I liked, one was meh and the extra bottle lingered in the basement. Looking for something else I accidentally toppled it. Looked at the left and saw a bottle of cooking Calvados…
Cider
Apple
Calvados
Apple
Normandy
Pie?
Sometimes my brain works like that. Even when I am not drinking cider.

P2080794

Pie dough. I don’t know where I got this recipe from but it was not my favorite so I won’t repeat it here. Just use a recipe you like, or go Dutch and make a cake/cookie like crust. This one was tasty but a bit brittle. Personally I like to up the ratio filling crust some more. The filling however was different from what I usually do.

Cider Apple Filling(adapted from the weekend baker, Abigail Johnson Dodge)
1 kg (2 lb) firm apples, peeled, cored, cubed 2cm
2 tbs butter
140 gr (5 oz) light brown sugar
1 tsp ground cinnamon
1/4 tsp ground nutmeg
100 ml (3.5 fl oz) apple cider
50 ml  (2 fl oz) calvados (because that’s what I had I used “cooking calvados” which is cheap and comes already flavoured with a bit of salt and pepper) By all means use the real stuff if you have it! (Or cognac?)
3 tbs cornstarch
In a large heave deep skillet/pot melt butter, combine sugar and spices and sprinkle over the apples, stir to combine and cook apple cubes on medium heat until they are softened a bit (3-4 minutes).
Adjust heat to high and add cider, stir and keep stirring, cook until the sugar has dissolved and the cider comes to a soft boil. Meanwhile combine calvados and cornstarch in a small bowl and add this pasty mixture to the boiling cider-apples in your pan. Keep stirring and boil until the liquid is thickened and clear, this will take about 1 minute. The apples still need to be crunchy at this point so don’t boil until you have apple sauce! :-)
Remove from the heat and let the apple mixture cool to room temperature.

Assembling the pie:
Now that is going to tough….. Not really.
I used a 9 inch (22 cm) Pyrex pie plate, buttered.
Then rolled out the dough to a 14 inch/35 cm round, lifted it onto the pie plate and adjusted so that I would have an even overhang. Nudge the dough into the sides of the dish. I like to use a small ball of dough to push the crust against the sides. I have long nails and that causes tears and stretching so a small ball of dough pushed against the sides gets the dough exactly where I want it!
I love the lattice crust! To make a lattice crust you roll out a rectangle (9x14 inches / 23x35 cm) and cut strips 2 cm wide and 35 cm long. On a piece of parchment arrange 6 strips horizontally, setting them 2 cm apart. These are the bottom strips. You’ll need another 6 strips for the top.
Two methods:
- one where you make the lattice crust directly on the pie
- one where you weave the lattice crust separately on a piece of parchment
Now, I could explain in writing how to proceed and that would be fine, however, images in this case say so much more than words….
I didn’t take pictures of the process but here is an step by step instruction, and maybe even better, here’s  a lattice crust on Youtube! (The latter uses a different method than I did but the effect is the same, plus she shows that you don’t need to weave to get a beautiful result). Both of the examples weave their crust directly on the pie and that’s fine. I created the top separately and chilled in the fridge for 15 minutes, then inverted the whole thing onto the pie (remember the parchment paper underneath? that’s why!). It’s easier to correct weaving mistakes this way and your dough strips aren’t getting wet and slippery from the filling, but I find it quite hard to position the top exactly right on the filling afterwards so there is something to be said for either way.
Now that you’ve topped your pie with a crust, it’s time to preheat the oven to 425F / 220 C (or 200 convection). Meanwhile trim both crusts, leaving a 2cm/3/4 inch overhang. Roll the overhang under itself to provide a high edge that rests on top of the plate rim. Pinch crimp the edge using your thumb and forefinger of one hand on the outside while you push your other forefinger on the inside to make a dent. Brush with milk.

Bake for about 55 minutes until the crust is golden and the apples are tender when pierced with the tip of a knife. I had to top my pie with some foil because it started to brown a bit quickly.


P2080796
Technorati Tags: ,,,,

Sunday, March 17, 2013

Bread Baking Babes: Gâteau á la Crème !


IMG_0760

As Lien says in her blogpost; we bake up a treat this time! Lien over at Notitie van Lien/Lien’s Notes invited us in her Kitchen of the Month and decided we would bake something different. Something with eggs, lots and lots of eggs and oh butter was involved as well! Not to fear though she said, this was truly Bread Baking Babes Business because the dough uses yeast.

I was a bit terrified when I read about the egss and the butter in the dough. Notoriously bad risers those doughs! I have this nemesis recipe with eggs and butter and whiskey to make rolls… and every time I try it the dough will stay as it is. (Like a terrified dog? “Down I said and don’t you move!” That’s how that whiskey dough behaves, and it doesn’t even whimper).

Anyway, back on track, not this dough Lien said. This dough, she said will behave and will rise. To make sure we were all duly convinced she baked the recipe up and showed us the tricks of the trade. Wow. That girl knows her dough. She figured out how much dough per gateau (say that out loud please? Just for fun? Aaaah.. that feels good right?) how much dough-per-gateau we needed and the amount of filling each gateau should have. Dedication my friends, sheer dedication!

BLOG 154

I am so happy Lien baked this before we all tried, because we’re both in the Netherlands, working with the same flours. I did change one small thing to the dough because someone mentioned the resulting bread a bit dry because all the liquid comprised of eggs. So I substituted 1 egg with 90 gr. milk. And the dough did rise! I was so surprised but it behaved very well. Then the risen dough went in the fridge for a cool-down period so it’s easier to shape. For shaping (and the rest of the recipe please check out this video here.  Mind you, Lien has rewritten the recipe to accommodate for 2 small ones, or if that's too much richness for you, you can make one round gâteau with a small brioche loaf on the side. They take about the same baking time, so just place the tin next to the gâteau when you bake it.


For the brioche dough
250 g strong plain flour
3,5 g sea salt
2 TBsp caster sugar
1 TBsp fresh yeast or 1 1/2 tsp active dry yeast
3,5 free-range eggs, preferable organic (the other half egg will be used for the glaze)
150 g unsalted butter, cut into small cubes (cool room temperature)

For the crème filling (for two small gateaux, if you want to make 1 small gateau and 1 plain loaf, half it)
6 free-range egg yolks, preferably organic
60 g caster sugar
1 lemon, juice and zest
250 ml crème fraîche

For the glaze
1/2 egg, preferably organic
1/2 TBsp caster sugar
10 g (¾ oz) butter, cut into cubes (optional)
1/2 - 1 TBsp nibbed sugar, to decorate

Preparation method
1. For the brioche dough, place the flour, salt, sugar and yeast (keeping the yeast away from the salt as it will attack it and damage its ability to ferment), in an electric mixer bowl. Add the eggs and mix with a dough hook attachment for 5 minutes on low power until the eggs are completely incorporated (alternatively, place the ingredients in a large mixing bowl and stir together for 5 minutes).

2. Increase the speed of the machine or your stirring and mix for another 5 minutes until the dough comes away from the edge of the bowl. Then add the cubes of butter and continue to mix for 2-3 minutes until completely incorporated.

3. Remove the bowl from the machine, if using, then cover with clingfilm and set aside at room temperature for 1 hour to prove, then chill the dough for a further hour (it will be easier to work with).
4. Preheat the oven to 180ºC/360ºF.

5. Lightly flour a work surface and your hands. Take half of the brioche dough and bring it together with the palms of your hands to form a ball, then place it on a baking tray and flatten it slightly. Starting from the middle of the dough, gently press the dough flat and spread it out to form a circle to approx 24 cm ( 9,5 in) in diameter, but leave a 2 cm (1 in) gap from the edge as this will create the rim of the tart. Be careful not to stretch the dough and try to keep the base even in thickness. Use the second half of the dough for another gateau or make a small loaf from it.

6. Cover with lightly greased plastic and a clean tea towel and place the dough in the warm area for 25 minutes.

7. For the crème filling, mix the egg yolks, sugar, lemon zest and juice together in a large mixing bowl and gradually mix in the crème fraîche. Set aside.

8. For the glaze, brush the rim of the gateau with the egg yolk and sprinkle with the nibbed sugar and prick the base of the dough evenly with a fork to help the even cooking and rising of the dough. Pour 1/4 the crème mixture inside the rim of the dough of one gateau, sprinkle with the caster sugar and dot with the butter. Pour in the other 1/4 when the baking sheet is already in the oven, so you won't spill. (make the second one the same way)  and bake in the preheated oven for 25 minutes, or until the brioche has risen and the filling is set. Remove from the oven and set aside to cool, then serve.

NB: For this recipe you will need a food processor with a dough hook attachment. (Or work the dough in the bread machine like I did, take it out for rising)
(adapted from: Raymond Blanc "From Raymond Blanc's Kitchen Secrets")

BLOG 153 

So why does it look so appetizing on all the other girls blogs and I am not completely blown away by mine? I found the dough rather dry, I think I baked it at a too high temperature too long? (And I completely completely forgot to let the dough rise for a second time!!
And I have to confess I did unmentionable stupid things to my filling; overdoing it on the vanilla is one thing, adding raspberry vanilla infused vodka instead of lemon, adding canned figs. Because they look cute. Yes. I should have stayed true to the recipe.
My filling behaved like the stock market these days, it rose and fell never to come up again. Can you tell I’m a little sad? I even contemplated to not post and make it again last night… but no. Instead I went out for a dinner date with the husband and had the most horrible bread ever with our wine. Pah! That’s heavenly punishment enough.

Posted!


Buddies!! As always you're all very welcome to bake along as our Bread Baking Buddy. Bake, tell us what your thoughts are about it, blog and send it all to Lien (notitievanlien(at)gmail(dot)com), so she can return the favour by sending a Buddy Badge back ánd include you all in a round up of the Buddies. Deadline 29th of this month as usual. Have a great time baking and Happy easter!

Bread Baking Babe Bibliothécaire – Katie
blog from OUR kitchen – Elizabeth
Feeding my enthusiasms – Elle
girlichef – Heather
Life’s A Feast – Jamie
Living in the Kitchen with Puppies – Natashya
Lucullian Delights - Ilva
My Kitchen In Half Cups – Tanna
Notitie Van Lien – Lien
Paulchens Foodblog – Astrid
Provecho Peru – Gretchen


Technorati Tags: ,

Saturday, December 22, 2012

Bread Baking Babes; December Holiday Apple Kuchen

Technically I’m not a Babe this month but a Buddy. I think. We’ve had a couple of busy weeks and somehow this cake travelled to the bottom of the list. Yesterday was a long long day for me. It started very early in the morning (as in 3 o’clock early morning) with a trip to the airport. Son #1 planned a 2 week holiday to visit a couple of friends in Japan and of course we waved him goodbye. So on our return a couple of hours later the day officially just started. Plenty time to bake! I started the dough for the Christmas stollen and next was this cross between a cake and a bread. A German apple tray bake on a yeasted dough base. BBB Kitchen of the month: Gretchen, Provecho Peru Holiday Apple Kuchen December 2012.
Followed the recipe but substituted custard powder for the tapioca, used a little less butter. After it had it’s 30 minutes of fame in the oven I decided it needed more than that to get crispy. I was a bit Dough Whiskalarmed by the amount of liquid bubbling up at the sides, afraid the bottom would be all soggy. So it took some 10 minutes extra in the oven. In retrospect maybe I should have left it at the 30 minutes and put it under a broiler/grill to get the top nice and crispy. The dough got a bit dry with the extra oventime.
All in all this is an easy bake, the dough behaves very nicely, it’s a tough, stiff elastic dough but will stretch comfortably to fit in the pan. I only used the handmixer for the initial mixing, when I added the remaining flour I used the dough whisk to beat the rest of the flour in. A bit of elbow grease but easy!
Didn’t make the cream cheese topper, in general I love dollops but not when it involves cream cheese.
Would have loved a mascarpone mixed with in this case a bit of rum and brown sugar for instance. Or now that I think of it, what about caramel drizzle? For now I’ll just use a bit of whipped cream.
 
 
BLOG 114
Holiday Apple Kuchen

Yield: 12 servings
Source: from the Better Homes & Gardens Holiday Baking 2009 Magazine

Crumb Topping

  • 100 gr or 1/2 cup flour
  • 70 gr or 1/2 cup brown sugar
  • 3 tablespoons butter

In a medium bowl, combine flour and brown sugar. Using a pastry blender, cut in butter until the mixture resembles coarse crumbs. Set aside.

Apple Kuchen

  • 350-390 g or 2 1/4 - 2 3/4 cups flour, divided
  • 7 gr or 1 package active dry yeast
  • 120 gr / 1/2 cup milk
  • 100 gr or 1/2 cup Demerara // granulated sugar (I used raw cane sugar)
  • 50 gr  or 1/4 cup butter
  • 1/2 teaspoon salt
  • 2 eggs
  • 4 cups apple slices (about 4 medium baking apples)
  • 66 gr or 1/3 cup brown sugar
  • 1 tablespoon quick cooking tapioca (didn’t have any, used custard powder to bind the liquid)
  • 1 tablespoon lemon juice
  • 1 teaspoon apple pie spice (used our Dutch speculaas spices (click to make your own) which is almost the same)

Grease a 13x9x2 baking pan; set aside. In a large bowl, combine 1 cup of the flour and the yeast; set aside.

In a small saucepan, heat and stir milk, granulated sugar, butter and salt just until mixture is warm (120F-130F) and butter almost melts. Add milk mixture and eggs to flour mixture. Beat with an electric mixer on low to medium speed for 30 seconds, scraping sides of the bowl constantly. Beat on high speed for 2 minutes or until smooth. Beat in as much of the remaining flour as you can without the mixer. Stir in any remaining flour to make a stiff batter.

Spread batter into the prepared baking pan. In another large bowl, combine apples, brown sugar, tapioca, lemon juice and apple pie spice. Place apple mixture on top of the batter. Sprinkle with Crumb Topping. Cover and let rise in a warm place for 1 hour.

Bake in a preheated 375F oven for 30 minutes or until top is browned and apples are tender. Cool on a wire rack for 30 minutes.

Cut into 12 pieces and serve warm or at room temperature with a dollop of Cream Cheese Topper on each piece.

Cream Cheese Topper

  • 1 (8oz) package cream cheese, softened
  • 2/3 whipping cream
  • 2/3 cup powdered sugar

In a small bowl, beat cream cheese with an electric mixer until smooth. Beat in whipping cream and powdered sugar.

Please visit my fellow Babes (their posts on the right hand side --->) or bake along with us and become a Buddy! Also Katie as our BBBBBBB will have a Babe round up ready.

What IS this Buddy thing?
The Bread Baking Babes are a closed group but we thought it would be fun to reward people who take the effort of baking our breads with us and give them a nice Buddy Badge and mention in a round up post every month. Just to say thank you for baking along and sharing your thoughts with us.
Since we are Babes and do not obey to rules, there are nearly no rules for Buddies, except these:

Bake the featured bread, snap a pic & share your thoughts about how you liked it (or not liked it)

  • leave a comment on Holiday Apple Kuchen that you have baked the bread, leaving a link back to your post, or email Gretchen and mention BBB December Bread in the post

We’re on Facebook as well!BLOG 116

Technorati Tags: ,,

Friday, November 02, 2012

ABC Bakers… Velvety Pumpkin tart.. in timely fashion (not!)

blog 026 This is just one big oops.
I roasted my own pumpkin (ooh that smell, I love it!) then made my own pumpkin puree, baked the pie… and never posted! So this is going to be a quick one, and to add worse to already bad I am going to antedate the post as well. Hah, try to keep me from it!
Saturday 20 October and we were having guests on Sunday so I set out to make the pumpkin pie (hehe, just to show you it was there, right on time) The pumpkin roasting in the oven made the house smell wonderful and the puree was fixed easily. As always I was surprised how little puree you get from one nice sized pumpkin but it was plenty for the pie. I used “bastogne” cookies for the crust and added a little bit of extra butter to get them at the right consistency. The filling was very easy to make but I was a bit worried about the amount. It looked like it wouldn’t fill the pan properly…. As you can see from the pics I got a very shallow tart but I must say the ratio crust – filling for us was perfect. Not too much gooeyness, not too much crust.  two Dutch cookies called  Bastogne koek  on a white background  Stock Photo - 15006207
I wasn’t exactly smitten with this pie although our guests –and my family- really liked it. For me the cream cheese was a bit too much in it, very rich and the tang you get from it together with the richness is just not for me. The recipe comes from The Weekend Baker by Abby Dodge. Check out the other at the Avid Bakers Challenge

blog 028

Thursday, October 11, 2012

Apple Cake with honeyed creme fraiche topping

 Apple cake slice

  Apple cake honeyed creme fraiche topping

Recipe from Ulrike, found here.

Tessiner Apfelkuchen


Beslag:

125 gr zachte boter

ca 500 gram; geschild en in partjes (of ongeveer 6 kleine appels halveren en iedere helft op de bolle kant insnijden tot net niet helemaal door)

3 el citroensap om te besprenkelen

125 gram suiker

1 zakje vanille suiker

snufje zout

2 eieren (medium)

175 gram patent bloem

25 maizena

3 tl bakpoeder


Topping:

3 eieren, wit en geel gescheiden!

200 gr crème fraîche

100 gr vloeibare honing

Evt. poedersuiker om te bestuiven


Ingevette springvorm, 26 cm.

Oven voorverwarmen op 175C (Hetelucht 150C)


Boter, suiker, vanille suiker en een snufje zout zacht roeren. 2 eieren toevoegen en mengen.  In een andere kom bloem, maizena en bakpoeder zeven en in delen aan het botermengsel toevoegen. (Dit is een zg. roerdeeg dus je hoeft het niet luchtig te kloppen).

Appels zijn geschild, en in partjes verdeeld of gehalveerd en vanaf de bolle kant ingesneden en met citroensap besprenkeld.

Het beslag in de ingevette bakvorm verdelen, strijk de bovenkant glad. Druk nu de appelhelften in het deeg met de bolle ingesneden kant naar boven. (Of, als je zoals ik verschillende maten appel hebt; rangschik de partjes met de dikke kant naar boven in het deeg).

20 minuten bakken in de voorverhitte oven.

Maak in de tussentijd de topping:

- de 3 dooiers samenroeren met de crème fraîche en de honing.

- klop de 3 eiwitten stijf in een brandschone kom. (evt. kun je de kom en mixerhaken even met een papiertje en wat citroensap afnemen dan weet je zeker dat er geen spoortje vet meer achtergebleven is)

- Vouw met een spatel de eiwitten door het crème fraîche mengsel.

- Neem de cake uit de oven en verdeel de topping gelijkmatig over de cake.


Terug de oven in; op dezelfde temperatuur nogmaals 25-30 minuten bakken tot de bovenkant mooi goudbruin gekleurd is en niet meer wiebelig is.


blog 013


Technorati Tags: ,,,

Wednesday, October 26, 2011

Restverwerking; foto’s en zomerfruit! Fruit cobbler

IMG_3607 
Toen we dachten dat de zomer nog moest beginnen.… niet wetende dat we zulke druipdagen zouden hebben. Toen ik helemaal geen zin meer had in bloggen. Niet wist wat ik te melden zou hebben wat in de verte nog de moeite waard zou kunnen zijn. Nou toen dus… werd er evengoed gekookt en gebakken. Weinig brood moet ik toegeven maar toch best wel andere dingen.
Zoals deze cobbler. Zo leuk en zo snel om te maken. Ik had rijpe perziken op de fruitschaal en een zak zomerfruit in de vriezer. Combinatie met een beslag en een hele vlugge cake op tafel. Kan niet beter toch?

Fruit Cobbler

Voorbereiding: 20 min
Oventijd 175C , 1 uur
Ingevette Ovenschaal: metaal, vierkant, 9 inch/23cm

Ingrediënten

  • 220 gram boter
  • 180 gram suiker
  • 150 gram zelfrijzend bakmeel
  • 220 ml melk
  • ik gebruikte 3 kleine perziken en een handje vol bevroren zomerfruit
  • extra suiker voor het bestrooien.
Doen:
IMG_3605Laat de boter smelten in een pannetje of kommetje in de magnetron. Meng suiker en bakmeel in een mengkom en roer daar de melk doorheen met een garde tot een dik pannenkoekbeslag). 
Voeg dan de gesmolten boter toe en klop alles flink door elkaar zodat je geen spoortje meer van de boter ziet en alles goed gemengd is. 

Giet het beslag in de ingevette ovenschaal en strooi het fruit erover. Grotere stukken kun je beter een beetje strategisch neerleggen, met kleine stukjes kun je je uitleven op het strooien. Indien gewenst –erg lekker- kun je nog wat suiker over de bovenkant strooien.
Bak ongeveer een uur in de voorverwarmde oven tot het mooi goudbruin ziet. Warm is het erg lekker, koud trouwens ook. Voor de liefhebbers kan er een schepje vanille ijs bij of een dot slagroom.
IMG_3612
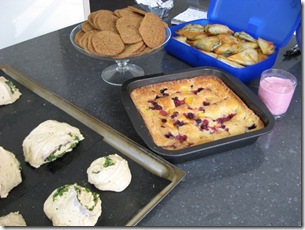
Op de foto trouwens ook chocolate chip cookies (ei-vrij recept hier), en spinazie in filo deeg. Hmmm en een spontane rood fruit milkshake, en nog gevuld brood met spinazie, kruiden en kaas vermoed ik. Zie je, ik doe nog weleens wat!

Monday, October 17, 2011

Plum tart

IMG_3753 This is a crap picture of something really delicious. See I had bought 3 kgs of these purple plums at the market. Got them for a really good price… and of course they were really …. let’s say ripe.
So much so that when I left them on the counter I could bin one or two each day. Not good.  I needed to do something. Not jam. Pie. Or tart. Or as someone suggested a crumble. I did tart. And that my girls was a good thing. Two strokes of genius at work here. First; a class A recipe from David Lebovitz. Second: peeling or skinning the plums.IMG_3749
I’ve made plum jam before and I used to leave the skin on out of sheer laziness because I didn’t want to bother with a ton of slippery reluctant plums. I put them through a food mill but the result of course always was a pink/purplish jam.
This time I did it right and I loved the result. It’s so simple!
Just like you would do with tomatoes you score a cross in the skin of the base of the plum. Boil a kettle and pour the hot water over the plums. Leave for a few secs until the skin near the cross starts to curl. Place in cold water, then peel off the skin. Easy as that.
The best thing is that you are going to cook the plums anyway so if they get  a little mushy from the boiling water it doesn’t matter. Then they went into a large saucepan with a little sugar (not too much I wanted to keep a little tartness) and I added some pectin as well. Cook until they fall apart, give it a good stir and let cool.
Easy Jam Tart
Adapted from David Lebovitz*
(Adapted from the Crostata recipe at Wednesday Chef)
100g unsalted butter, at room temperature
75 gr sugar
1 large egg
1/8 teaspoon almond extract
190g flour
70g fine ground cornmeal
1/2 teaspoon sea salt
2 teaspoons baking powder
Approx. 375 gr cooked plum puree**

coarse raw sugar; known as cassonade, turbinado, or demerara sugar, for sprinkling
1. Mix butter and sugar until well-combined. Mix in the egg and almond extract.
2. In a separate bowl, whisk together dry ingredients; flour, cornmeal, salt, and baking powder. Gradually add the wet ingredients, just until the mixture just comes together.
3. Measure about 2/3rd of the dough (about 330 grams), pat it into a disk, wrap it in plastic, and chill it. Take the remaining dough and roll it into a log about 2-inches (5cm) in diameter, wrap it and chill it, too
4. Remove the dough from the refrigerator and allow to room temperature slightly. With the heel of your hand, press the dough into the bottom and sides of an unbuttered removable bottom tart pan pat it out evenly. (I used one that’s 8″ but 9” or 10” will be fine as well, just make sure you save enough dough for the bottom).
5. Spread the jam evenly over the dough.
6. Remove the log of dough from the refrigerator and slice in cookie-sized disks, then lay them over the jam. Top with a scant 3 tbs of coarse sugar.
7. Bake for 20-25 minutes in a preheated oven (fan assisted oven 180C) until the pastry is golden brown. Let cool and serve at room temperature.
This tart is great on the day it’s baked but equally nice a day or even two days after. Just make sure it’s well wrapped.
* I used less butter, less sugar because our flour is different
** David suggest approx. 450 gr of any kind of jam as long as it’s not too thin/runny
Verdict: I baked and served this one on our combined birthday together with a frangipane ripple chocolate cake and a raspberry buttercream cake. The next day there were only two pieces of plum cake left! Nuff said! We loved it!

Friday, February 04, 2011

Gevulde pasteitjes / Cornish pasties

IMG_3195 En toen was mijn hele post weg! Als je niet saved en je laptop valt uit? Dan is het weg. Gaan we nog een keer maar dan wat minder uitgebreid als je het niet erg vindt. Recept heb ik hier vandaan geplukt en eigenlijk alleen de ingrediënten van de vulling aangepast aan wat ik op dat moment in huis had.
Voor het geval je in paniek raakt… het deeg is voldoende voor 4 grote pasteitjes, maar ik heb anderhalf keer het deeg gemaakt en vervolgens kleinere stukjes deeg genomen per pasteitje… jaaaa om het simpel te houden!  Nou ja, maar dan weet je in ieder geval waarom ik er meer dan 4 heb liggen.
Het deeg zit supersnel in elkaar en de vulling kun je voordat je het deeg maakt al snijden en zover klaarzetten. (Of uit de koelkast plukken ingeval van restjes). Het deeg hoeft niet te rijzen dus je kunt in één keer door.

IMG_3198 Cornish Pasties
Het deeg:
385 gr patent bloem
1 tl. salt
85 gr. margarine
85 gr. boter
170 gr water
De vulling:
250 gr vlees (fijngesneden bieflapjes, restje stoofvlees/rul gebakken gehakt) *
250 gr groenten zoals wortel, selderij knol in dobbelsteentjes
2 of 3 kleine aardappels in dunne schijfjes
1/2 ui, in dunne ringen
1 prei, ook in dunne plakjes
2-3 tl verse tijm (gedroogde oregano of herbes de provence kan ook)
25 gr blauwschimmelkaas zoals bijv. stilton of gorgonzola (gewone kaas mag hoor!)
zout en peper

Dan nog:

- extra bloem voor het werkvlak
- 1 ei plus 1 el melk klutsen om de deegpakketjes mee te bestrijken.
- Oven voorverwarmen op 200 C (hetelucht).

* het vlees voor de vulling kan gewoon rauw, vind het alleen in geval van gehakt niet handig maar als je geen restjes gebruikt kun je gewoon rauw fijngesneden mager rundvlees gebruiken.


~~~~~~~~~~
IMG_3192Gebruik ofwel de keukenmachine met het mes of je handen.
Bloem en zout mengen, kleine blokjes boter en margarine toevoegen en doorknijpen/wrijven zodat het kleine klontjes vormt. In de keukenmachine: puls met korte stootjes totdat het lijkt op nattig grof broodkruim, dit overdoen in grote kom.
Water toevoegen en met een vork omscheppen totdat alles bevochtigd is. Met koele handen vlug in een bal vormen (niet teveel kneden). Dan op een licht bebloemd werkvlak uitrollen. Opvouwen, kwartslag draaien en weer uitrollen. Doe dit nog 2x.
Zoals Kelly zegt: geen paniek, je maakt geen bladerdeeg!
Verdeel het deeg in 4 gelijke delen en zet apart.
Je hebt de ingredienten voor de vulling al klaar staan. Toch?
Rol een stukje deeg uit tot een rondje van ong. 20 cm.  Laagjes maken door te beginnen met een paar aardappelplakjes aan één kant van het deegrondje. Dan volgen de blokjes groente, de ui, de prei en het vlees als laatste.
Strooi wat thijm, zout en peper erover en iets bloem. Nog wat van de blauwschimmelkaas erover (een paar krummels).
IMG_3193Strijk met je vinger wat water langs de rand van het deeg, pak dan de ene kant van het deegrondje op en leg die over de vulling op de andere kant. Til voorzichtig op bij het randje (vulling schuift nu wat naar onder en je hebt eigenlijk een zakje vast) en knijp de randen goed vast. Je kunt een mooi randje maken bovenop door een draaiende knijp beweging te maken zodat het deegpakketje eruit komt te zien als een stegosaurus. (briljante observatie van Kelly! lol).
Zet het pakketje op een bakplaat en bestrijk met het eimengsel. Doe dit voor alle pakketjes. Maak als laatste met een mes een sneetje vlak naast de top zodat evt stoom kan ontsnappen.
Bak ong. 25 minuten tot goudbruin. Heerlijk!
Poehee… wat een verhaal! Maar weet je… het valt echt reuze mee. Het lijkt een heel gedoe maar het is lastiger opschrijven dan maken. Heus. Beloof ik. En dan ga ik nu even kijken of ik dat superhandige filmpje kan vinden zodat je kunt zien wat ik bedoel.
JA! Hebbes!  Geweldig; Oma maakt pasteitjes… “me lard an’ me butter”
en bij deze kun je zien hoe de vulling wordt gestapeld en de rand wordt geknepen.IMG_3194

Sunday, December 12, 2010

Orange cheesecake Austrian style

IMG_3175

(cheese cake without the marmalade topping)

Austrian? I really don’t know but that’s how I think about this one.  At one time I had a lovely topfen kuchen(at least that’s what I think it was called?) in Vienna and went looking for a similar one ever since. The one I had was encased in a filo dough and the filling had a loose and at the same time creamy mouthfeel. A quest.

I was very pleasantly surprised by this recipe from Michel Roux, nice nice nice! That one day in September (another birthday party) I baked two….  guests had a choice of this cheese cake an apple/peach coffee cake, brownies and chocolate cake. This one and the apple peach coffee cake were polished off completely, people were getting seconds (and thirds!).

Orange Cheese cake
(Michel Roux: Pastry sweet and savoury)

Dough:
125 gr ap flour
100 gr chilled butter, diced
50 gr confectioners sugar
pinch of salt
1 egg yolk

22cm/24 cm round tart pan, 4 cm high, sprayed or lightly buttered
parchment paper and beans for blind baking
Oven temp: 170C for baking the shell / 140C for baking the cake

In a food processer: combine and mix all ingredients and stop just when the dough starts to ball up. Take it out and knead 3 or 4 times quickly with your hands to make a rather smooth dough ball. Wrap in plastic and chill in the fridge for at least 1 hours.

When you are ready to bake take the dough out of the fridge and proceed to roll it out on a lightly floured work surface. You’ll need a circle that fits your 22cm tart pan. (Dough needs to go on the bottom and up on the rim). When shaped place it back into the fridge to thoroughly chill again (at least 20 minutes).

Poke the crust with a fork and line with parchment paper. Pour the raw beans on the paper, bake blind for 30 minutes. Then carefully remove the beans and the paper (optional: you can also brush with a little egg white now to provide an anti-soggy layer) and put the crust back in the oven (“naked”) for another 5 minutes. Get it out and leave to cool on your counter.
Lower the oven temperature and in the meantime prepare your filling:

Filling:
4 oranges (juice and zest) (I ended up using around 1/2 cup of juice)
350 gr fromage frais*
350 gr quark**
150 gr sour cream
175 gr fine granulated sugar
4 eggs

Topping:
6 tbs orange marmalade

Sieve the juice of the 4 oranges. Using a spatula mix fromage frais, quark, sour cream and sugar thoroughly. Whisk the eggs frothy and fold them into the cheese mixture. Add orange juice and zest and stir smooth.

Pour the filling on your base and bake for 1.1/2 hour in a preheated oven: 140C/290F. When it’s properly baked a toothpick should come out clean. Leave the cake in the form to cool for 20 minutes then remove the outer ring and let cool completely. Chill until use.

For the topping: lightly warm the marmalade to a spreading consistency and use the back of a spoon to distribute evenly over the surface of the cake. Wait a couple of minutes to let the jam firm up again and serve.IMG_3139

(a little sugar on the bottom prior to prebaking the crust, another idea is to brush the pre-baked crust with egg white)

* fromage frais? I bought a tub that said fromage frais..but to be honest I think that was just quark, I couldn’t distinguish between this and a regular quark. Consistency of the one I bought was like very thick yoghurt, this one had 3.2 %fat. Next time I find myself in France I’ll check and see what fromage frais is like there. You might Google it and find confusion like I did.

**quark? I used a full fat one, 10% fat. Consistency again of very thick yoghurt, like Greek yoghurt for instance.

{I was afraid that although the recipe mentioned fromage frais I should have bought cream cheese so to make sure the filling wouldn’t go runny on me I added 1 TBS of each custard powder and cornstarch. Just making sure…. but I think it wasn’t really necessary)

Wednesday, August 18, 2010

Flaky! Tomato Tart

IMG_0929Not me, my crust. Very flaky and delicious. Better still, it was whipped up in minutes. No chilling the dough, no patching an unwilling crust.

Easy. As pie.  (Although I’m afraid that when I do make it again I will fail terribly. It has happened before). Until then we were very happy to have this for a light dinner. The filled French Bread you see on some of the photos was geared towards the picky eater son. He was as happy with it as we were with the tart.

Husband noted that it was more filling that it looked. Which in his opinion is a good thing. I can totally see this for when you have company for lunch, or in small slices served as an appetizer.

A perfect crust to use for all kinds of idle vegetables, and equally good I think to use for sweet fillings as well. Husband thought it was a tad too sweet for a hearty filling… (I’m not so sure but I kind of understand where that comes from).

Got the recipe from a trusted source and totally followed it as written including the higher temp in my convection oven. I was a bit worried about the tomatoes spilling liquid and thus a soggy crust. Didn’t happen. Might be that the Dyon mustard prevented that.IMG_0926

Tart Filling

One unbaked tart dough (see recipe, below)
Dijon or whole-grain mustard
2-3 large ripe tomatoes
2 tablespoons olive oil
salt and freshly ground pepper
two generous tablespoons chopped fresh herbs, (thyme/chives/tarragon)
8 ounces (250 g) fresh or slightly aged goat cheese, sliced into rounds
Optional: 1 1/2 tablespoons flavorful honey

(I used what I had on hand, fresh parsley and basil, plus freeze dry lemon thyme, drizzled a little honey, and used mozzarella instead of goat chees although I think the goat cheese adds some more spike to it )

Tart Dough

1 1/2 cups (210 g) flour
4 1/2 ounces (125 g) unsalted butter, chilled, cut into cubesIMG_0931
1/2 teaspoon salt
1 large egg
2-3 tablespoons cold water

1. Make the dough by mixing the flour and salt in a bowl. Add the butter and use your hands, or a pastry blender, to break in the butter until the mixture has a crumbly, cornmeal-like texture. (I went the easy way and used the pulse button on my Magimix)

2. Mix the egg with 2 tablespoons of the water. Make a well in the center of the dry ingredients and add the beaten egg mixture, stirring the mixture until the dough holds together. If it's not coming together easily, add the additional tablespoon of ice water.

3. Gather the dough into a ball and roll the dough on a lightly floured surface, adding additional flour only as necessary to keep the dough from sticking to the counter.

4. Once the dough is large enough so that it will cover the bottom of the pan and go up the sides, roll the dough around the rolling pin then unroll it over the tart pan. "Dock" the bottom of the pastry firmly with your fingertips a few times, pressing in to make indentations.

5. Preheat the oven to 425ºF (218ºC).

6. Spread an even layer of mustard over the bottom of the tart dough and let it sit a few minutes to dry out.

7. Slice the tomatoes and arrange them over the mustard in a single, even layer. Drizzle the olive oil over the top.

8. Sprinkle with some chopped fresh herbs, then arrange the slices of goat cheese on top. Add some more fresh herbs, then drizzle with some honey, if using.

9. Bake the tart for 30 minutes or so, until the dough is cooked, the tomatoes are tender, and the cheese on top is nicely browned. Depending on the heat of your oven, if the cheese doesn't brown as much as you'd like it, you might want to pass it under the broiler until it's just right.IMG_0937

Monday, March 29, 2010

Rijstevlaai / Rice pudding pie

Such a bad blogger! I promised to send or post a recipe for Rice Pudding Pie or Rijstevlaai... and I can't remember who asked me. * hangs head in shame *

I baked another one using a pie plate hence the different shape, originally a vlaai would be baked in a very large shallow and scalloped pan. And when I sat down tonight to write up the recipe I thought hey... didn't I do so already? Some time ago? I think I did!

It's right here! Yes pictured is one topped with apple slices, but the basic recipe for rice pudding pie is there. Another picture can be found here. The secret to a true rice pudding pie is the filling of soft creamy rice, flavoured with vanilla (although cardamom is really nice as well) and the finishing touch is the golden layer on top; consisting of an egg combined with sugar and whisked until very pale coloured, this is poured over the rice pudding and then baked. Like so: