Sunday, July 22, 2007

Gone camping!

Baking Soda and family are gone for a while...and she is still debating whether she will smuggle some spoon measures and a scale in her luggage, dreaming of baking bread "in situ".

{A scale? I advocate the use of weight instead of volume to bake, but now I'm trapped...does this mean I need a scale to bake bread whereas the Otherzzz are happy to have a cup/mug/holding vessel and bake wheresoever they are. Erm..not good! I can do without a scale!}

The bags are packed, we've tried the new tent for the boys. Worked fine. Except that you'll need Houdini skills to get it back in the bag it came in. I think I'll try to convince them that sleeping under the stars is real adventurous and way cool.
I don't know where we're going yet, (well, we do know, sort of, direction is going to be Sweden and Stockholm but other than that.....just where the winds will take us.) Hope you have a nice time as well, I'll be back in a bit!

Beware; Red Alert!!! I will be back sooner, that is if I can find Internet access to publish this one very important post! Don't forget to check back around the 30th!

Thursday, July 19, 2007

Ciabatta, the making of

These pictures show my hands as if they belong to an Italian mama, stretching and pulling dough. Give me a while more and I'll develop the hips and upper arms that go with it as well (believe me, those are on their way, I've taken up the habit of just elegantly wiggling my fingers as a greeting instead of a full length arm wave). As an aside: I hereby solemnly declare that we -DH and I!- are going to the gym as soon as we're back from our vacation.*
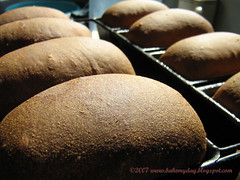
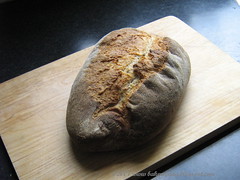
cough* Let's go back to bread, I used Peter Reinharts recipe in the Bread Baker's Apprentice for the dough, apart from tweaking the amount of flour a little, everything went smoothly. In fact I smoothed all over one step in proofing the dough. Ahem. How can I just skip an entire step in the proofing process and not notice? Too busy looking at the pictures that explained how to stretch and fold the dough I think.

Am I the only one who wonders if the pretty assistent is a real human being or a mannequin doll? She is so flawless! I wonder where they found her, in the bakery? On the street? Out of a model agency book that specializes in baker's apprentices?

Anyway, despite missing one proof, we had lovely ciabatta that weekend. Light and open crumb, crackly crust. My main point of telling you this besides showing a pic is that I used a linen cloth to proof the bread. (Act amazed, thank you). Kidding aside, my friend Monique and I were on the market in Utrecht some time ago and bought very heavy linen, meaning to use it as a makeshift couche, it went into the washing machine and in the basement ... going unused for months.

Mostly I use plain plastic bags to proof my dough and that works fine. I am always a bit weary to use cloth for fear that it would dry my dough and make this ugly tough skin on top thereby ruining the chance of ovenspring. I used cotton tea towels before and I wasn't satisfied with the results. I was indeed happy with this undertaking, floured thoroughly the cloth made the folds I wanted and my ciabatta's rolled off perfectly.

Monday, July 16, 2007

The A (pron) team

I'd like you to meet a part of my private A-team, sons in aprons.
When Ilva asked to show us your apron I thought I shouldn't participate. My aprons are very efficient but booooooring! I never used to wear an apron and I have plenty of ruined clothes to prove that that is not a wise thing to do. Lately my sons have adopted the habit from their Dad to don an apron when we have hazardous foods for dinner. So, the moment I untie my apron they will tie it on and I find myself at the dining table surrounded by men in ties enjoying their pasta.

The funny thing is, when I rummaged through my kitchen cabinets and made the picture it struck me that aprons are a real memory vehicle! Who would have thought that? And I am not the only one, I've read a touching story here , a funny story here and here as well and there are lots more I'm sure. You'll find them at Ilva's round-up.

My stories: the blue and white apron on the left was the first one I bought when my mom and I visited London on a mum and daughter weekend. Memories! The boy on the right hand side was a toddler and the twins on the left...not even a thought.

The yellow one in the middle is an apron DH got as a farewell gift when changing jobs. His co-workers wrote some funny stuff all over the apron, one very wise advice: "When in doubt, add more wine!"

The green one is the one my husband presented me with when he found me in tears, crying over a favourite shirt, ruined by fat splatters. It's big, it's long and it covers almost all of me!


My last one: a real baker's outfit, blue and white checkers....a present from Tanna and Sue when they were visiting Holland and got wild in our local cook store! Sweet thoughts, again!

Ilva, they are not as pretty as some of the aprons I've seen but here they are, filled with memories.

Thursday, July 12, 2007

Jamie Oliver's stew

So simple and yet delicious. I must confess from time to time I suffer from a bit of Jamie overload. The omni present Jamie and his band of followers is getting a bit on my nerves. I mean tv-series, tefal pans, cookware, aprons, a "flavour shaker"? Come on! But still, I like him. Who couldn't like Jamie? Maybe that is the problem, the fact that everybody likes him. He doesn't need me to like him. *Sniffs*

I own only two of his books and they make for fine reading but somehow I don't make as many recipes from them. Why? Beats me! Recipes are clear, ingredients are simple, preparing them is a cinch. Maybe that combination makes me wonder: could this be good enough to try? As a matter of fact: a whole hearted yes!

As the weather continues to be definitely un-summery I was a bit uninspired but this brought a smile on my face:

olive oil
700 gr potatoes, peeled and cubed
2 red onions, peeled and chopped
2 carrots, peeled, chopped
2 celery sticks, chopped
2 sticks rosemary, just the needles
1 ts ground cumin
1 heaped tbs smoked paprika powder
zest and juice of 1 orange
------
800 gr lean stew beef
400 gr borlotti beans (can or rehydrated)
400 gr canned tomatoes
salt + pepper
for garnish: greek yoghurt/sour cream, fresh cilantro

Not much cooking involved, throw it together Jamie-style: heat olive oil in a large dutch oven and add first list of ingredients, stir, let cook for a minute or two, stir again. Period.
Add rest of the ingredients, salt and pepper to taste and add as much water as needed to almost cover. Period.
Bring to a boil and put in the oven. Period.

Oven temperature? Well that depends on when you'd like to have dinner, at 180C it's ready afer 3 hours cooking, longer time needed? Oven 140C....6 hours. Crowd pleasing dinner fare and easy on the hostess!

I mean, when you read this are you pressed to try? You better do because it's really delicious!
Serve with rice or pasta as a stew or wrap in tortilla's and serve with quacamole....

That's all folks!

Tuesday, July 10, 2007

Swedish Limpa

{Blogger won't accept any titles at the moment... but.....look what the lovely Meeta has to say in the comments....that worked! thanks sweetie!}

Anyway, I've made limpa before, from scratch and from a mix of flour we brought from Sweden, I even tried the mix from Ikea (twice, but both times I couldn't get a satisfying result). This is one I made using the recipe in Baking with Julia. Resulting loaves were very good although more flavoured than I used before. This larger amount of spices makes the bread a little less versatile; I like it with cheese but cold cuts is a bit more tricky due to the use of anise seeds and orange. Toasted with a dab of butter it's downright delicious.

Crust and crumb each were just perfect (see pic below) I admit that I love a crusty artisan bread but that's not what you are aiming at here. This bread makes a soft and somewhat chewy crust, (which is caused I think by the amount of sweetener) blends perfectly with the soft crumb inside. Breads made with part rye can be a little gummy inside because it's very tempting to add either more flour or even water in the dough-making stage, be careful not to do that, the rye will continue to absorb water during proofing. Adding more flour than needed will result in a dense and dry crumb whereas adding too much water in the initial stage will render a clammy, gummy crumb. Recipe:
(adapted from Baking with Julia by Dorie Greenspan)
2 cups milk (scalded and cooled till lukewarm)
1 ts caraway seeds }
1 ts fennel seeds } grind coarsely using a mortar and pestle
1 ts anise seeds }
1 tbs active dry yeast (2.1/4 ts instant yeast*)
1 ts sugar (omitted)
1/4 cup warm water
1/4 cup molasses (used our Dutch stroop, but less)
4 oz (1 stick) unsalted butter, melted (used 70 grams**)
1/4 cup dark brown sugar (used less of our "basterd" sugar***)
1.1/2 ts salt
grated zest of 1 orange
1.1/2 cups light or medium rye flour (used the dutch "sharp" rye flour which is like rye ww)
5 - 6 cups bread flour (used 5x150 gr. = 725 gr ****)

I never proof my instant yeast so just combine water, milk, molasses, butter, brown sugar, salt, crushed seeds and grated orange zest in the bowl of your stand mixer. Using the paddle, whisk in rye flour and stir until smooth. Add 1 cup of the flour and again mix until very smooth (batter like). Switching to the dough hook, mix in as much additional bread flour to make a stiff dough.

While I almost always use my stand mixer to knead my dough, aiming at kneading for approx.
10 minutes on low-medium speed, I always allow some "hands-on" kneading to get a feel for the dough. Not much of a work-out, just a couple of minutes to really feel if the dough needs anything. This is going to be a smooth, soft dough, somewhat stiffer than you (I) would normally aim for.

First rise as usual in a lightly oiled bowl, covered with plastic wrap (plastic bag or as I do: a shower cap) for an hour or so, doubles in bulk.

Deflate and shape: gentle deflating by folding the dough over itself once or twice. Shape in desired shape: I made a "batard" and a round loaf that I proofed in a proofing basket, thoroughly floured. When using such basket you can either flour your dough ball, smoothing the flour over the dough with your hands or flour the basket itself making sure it has flour all over.
Again, the rye in the dough will get you a clay-like dough, not as airy as you would expect but don't worry it will rise....slowly.

Second rise: again cover with plastic and let almost double in size. Try to catch it just before it's peak, thus allowing for some ovenspring.
Bake in a preheated oven 375F for 35-45 minutes.
-----------------------------------------
Okay, now you should have two wonderful smelling loaves, while they cool it's time for some discussion:

Any suggestions on why the milk has to be heated? Other than giving the yeast a head start?

* on yeast: active dry vs. instant => when you're using instant you'll need to reduce the amount of yeast by 25%.

** this is a lot of butter, I sort of followed the recipe here but I made some heavily buttered/sweetened versions of dough before and somehow experience difficulties in rise. Why would that be? Any suggestions how I can improve that? There is a wonderful sounding recipe in one of my books using bourbon... made that once and failed horribly, the dough resembled playdoh even after 4 hours of rising...

*** Our Dutch basterd sugar is available in 3 colours: white, yellow and brown, a combination of granulated sugar with invert sugar, caramel and moisture added. It's not exactly muscovado sugar but can be substituted, however this kind of sugar has more moisture in it so take that into account (ie. cookies will spread more easily when using basterd sugar). The darker color is higher in moisture, invert sugar and caramel.

**** Tadaaa, here we go again.... exactly how much does a cup of flour weigh? What can I say that is not already been said. Scoop vs. spoon, level, sweep, fluff or not? In almost every book I own there is some explanation on a how-to in that particular book for that particular author (that is when you're lucky!). What I really don't understand is that something that evidently needs so much clarification is still being used. Beats me!

Love the books that give weights (in ounces or grams) next to cups, apart from pure greed that is one reason to just go and buy the book! I do have a set of metal cups in my kitchen (American, and yes cups as well as spoon sizes differ between the continents) but I adore my Salter scale that weighs in ounces as well as grams. Can you imagine the trouble a Dutch baker has to go through? Fluff, scoop, level, and weigh and accordingly taking into account the differences in flour (our European flour comes from softer wheat and as such you'll usually need more flour for American recipes, or not....), the weather and the age of the flour. All these circumstances have their influence on the way flour absorbs liquid.

Usually I calculate 140 grams for 1 cup of flour, why 150 in this recipe? Because Julia/Dorie explains that her cup of flour in this book weighs 5 ounces. I have a list on my fridge that says 5 oz = 150 grams and ahem, now I notice this little list which says that 5 ounces is 140 grams (checked with the converter on the right hand side, they are right!) which means that the list on my freezer is terribly wrong....... and I use it all the time..... HELP!!

· Beth 4.5 ounces (126gr)
· Kevin 5.2 ounces (145gr)
· Susan 5 ounces (140gr)

list is copied from the very recent discussion in A year in bread, please go over and read! And maybe add your thoughts to the discussion?

Sunday, July 08, 2007

From tapas to lunch to dinner, Albondigas

Next time I'm going to travel with food blogger friends to a big city I will bring an empty suitcase! On our last morning in London I had to rush out after I tried to close my suitcase (yes I did the sitting and jumping on the lid thing) and buy another bag.... The suitcase was closed but that was about all you could say, I didn't even dare look at it for fear it would jump open! For safety reasons and balance I divided the contents (books and books and loaf pan(!)) between the two.

What can you expect? We joined Joanna at Joannas Food for a lunch at Books for Cooks in Notting Hill and had a blast. Instant rapport with each other, the customers and the super friendly staff, 'cause everyone that enters this shop is having at least one thing in common: love for cookbooks! Besides browsing and reading (oh and they know what we need, they even have a couch there!) and making our own not-so-secret stashes of books to buy, we had a -heavily photographed- wonderful lunch in the testkitchen's tiny restaurant. Of course all four of us bought the book that was test-cooked that day. (100 Great Tapas by Pippa Cuthbert). The next stop was the Spice Shop right across the road.... Another foodies paradise!

The first dinner I made once back home were the Spanish meatballs, or Albondigas. A simple yet elegant dish with clean pure flavours, easy to love by both adults and kids. Cooks for Books served this on Orzo, I cooked rigatoni and added blanched broccoli.

Recipe: (adapted from 100 great Tapas by Pippa Cuthbert)

250 gr. "half and half" ground beef (in Holland that's pork and beef)
250 gr. lean ground beef
1/2 ts chili flakes
2 garlic cloves, peeled and pressed
3 tbs fresh chopped parsley, divided
2 small onions, finely chopped
2-4 tbs flour

2 tbs olive oil
1 red bell pepper, finely diced
3 sun dried tomatoes, chopped
1/2 ts sweet paprika powder
700 gr tomato pulp/canned chopped tomatoes
2-3 very ripe tomatoes, chopped
salt and pepper
Mix both ground meats in a large bowl with chili flakes, garlic, parsley, half the chopped onion. Season generously with salt and pepper. Take heaped teaspoons of the mixture and shape into small walnut sized balls. Sprinkle flour on a plate and roll the balls on the plate to lightly coat with flour.

Heat 1 tbs of the olive oil in a large non-stick frying pan and fry the meatballs until brown all over, keep tossing and stirring. Once brown, transfer to a large ovenproof dish which holds the balls in a single layer. Heat remaining tbs oil in same pan and add onion, diced bell pepper and paprika powder, sauté for 2-3 minutes.

Stir in the passata and add tomatoes, bring to a boil and cook for a further 3 minutes. Season to taste. Pour sauce over the meatballs and cook, uncovered, in a preheated oven (190C/375F) for 30 minutes, turning once during cooking.

Serve as it is as tapas, on orzo like Books for Cooks did for lunch, couscous or Tarly will be nice as well. We had this for dinner with rigatoni and broccoli. Nice light red wine... Really good flavours and very child-friendly as well. A sure keeper!

Friday, July 06, 2007

Summer?


"Just hatched, it's a freaking 12 C, pouring with rain, storm blowing....what summer!?"

Wednesday, July 04, 2007

Minty Pea bread for Bread Baking Day

We have a picture here! And it only took a minute (or two). Oh my!! Zorra it's here finally! My belated entry for Bread Baking Day no.1, featuring herbs which is hosted by Kochtopf at 1x umrühren bitte ("Stir once please"). For the round-up please click here at Kochtopf. Check it out, bread bakers are showing their fantasy loaves! Becke, of Columbus Foodie will be hosting the second Bread Baking Day, theme will be announced on July 6th.

This bread has gone through a lot of trouble... or I as I should say, the baker has. Apart from the trouble I've had to post any pictures at all there was more. First, I prepared the filling and accidently left it out on the counter instead of in the fridge....not good! Postponed making the bread, disappointed as I was..

Yesterday life got in the way....big time.

Today I started dinner early by cooking the last steaks from this cow I had in the freezer (so sorry vegetarians but it was very organic if that helps?), my pepper mill broke in half, shooting all the peppercorns into the steak pan, over the stove and onto the floor! Sweeped the floor, crushed some pepper doing that and tipped the meat into another pan trying to save as much as possible (beef that is, not pepper!). Meanwhile making the stuffing for the bread and preparing the dough, making notes (yes I did).

Dashed out in the pouring rain to get my fresh herbs from the garden and back inside, slipping on little balls of pepper, banging my head against the door, twisted my ankle and dropped the herbs... Made dinner, had desert, baked the loaf, vacuumed the floor, cleaned the kitchen, missed the deadline.

Finally a herb flavoured bread:
Filling:
400 gr frozen peas
handful fresh mint leaves
small amount of basil leaves
1 onion, minced
1 tbs olive oil
2 tbs butter
pepper/salt
dash of lemon juice

Cook peas in boiling water, only a couple of minutes, enough to soften them and drain. In a sauce pan heat butter and olive oil and cook onions on medium heat, let them soften and glaze. Add fresh herbs and stew for 2 minutes. Add peas, lemon juice and stir, let cook for a couple of minutes more. Mash the peas (or use a food processor) but make sure there still is some texture, don't puree, season to taste. Set aside.

Little detour to explain this particular filling; on our first day in London we enjoyed some traditional pubfare. As mentioned on the menu: fish & chips with mushy peas.... Not exactly a winner name don't you think? But this vivid green stuff was actually quite tasty, I was surprised, so much so that I tried to recreate our meal in the first week home, adding a salad. From there the idea was born to use the peas as a stuffing in bread....


For the bread itself I used a basic dough consisting of:
500 gr white bread flour
150 gr organic whole wheat flour
1.1/4 ts instant yeast
1.1/2 ts salt
1 ts herbs de provence
2 tbs olive oil
approx. 380 gr water

Dough will be very smooth, very supple and easy to work with. First -bulk-rise one hour (or until doubled in size). Deflate gently and shape.

I divided the dough in half and used a kind of fake-braid for one half of the loaf, rolling the dough out to a rectangle and spreading half the filling in the middle of it, making sure that I had 4 cm of bare dough left on each side. Proceed to cut strips at each side, cuts pointing downwards and fold each strip over the filling, alternating between the sides. Let rise, covered for 45 minutes.

The other half of the dough was used to make butterflies. Again, roll the dough out in a rectangle spread the filling over the dough, this time only leaving a border of 1 cm all around. Roll up from each long side towards the middle, so the rolls will touch each other in the middle of the dough. Pinch both rolls together to make sure they won't unfold again. Cut into 2 cm wide strips and place cut side down on a baking sheet. Let rise, covered for 45 minutes.

Bake for 40 minutes in a preheated oven (200 C). Check the butterflies for doneness around 25 minutes into baking time.

Sunday, July 01, 2007

On baking bread...and digressing mightily

anadamaklein

Baking bread started as a way of occupying myself, looking for another activity that I could do at home, after years of flower/green arranging and sewing (evening activities) this was another thing to keep my hands busy and my mind sane, next to some other time and mind consumers like children, a husband and volunteer work. I always -and still have- had my ups and downs with me being a stay at home mum, about not contributing in any significant way, about being stared at as if you are from another planet: "oh, you don't have a job? -Barely concealed snicker-: "Oh I do admire what you do but for me that just wouldn't do it, I need to develop myself and keep in touch with you know the real world" Aaargh, you snobby high heeled beep that's exactly what I am dealing with here, I am very much in touch thank you. And by the way, I am one of the people that makes that your kid has all these fun things to do in school. Dûh. But still, dent in my self esteem, not showing to the outer world but the imprint is there.

In searching the net I just stumbled on to this! You have to read it! Can we get any crazier? Alfa and Beta Moms in the Daily Mail. I think I choose to be a Delta mom as in flying high above all these petty nonsupporting thoughts. Tsk! And on another note, click here to read what it feels like...)

More time on my hands lead me to think I could go back to a paid job (yay!) although I discovered rapidly that as kids grow older they will need less hands-on management but still crave attention one way or another. (Can't really tell how much of this is "used to mom being there for us" but I haven't got the guts yet to let them -and myself find out).
I thought bread baking was going to be a nice little side step away from the other trouble I stirred up (hah, little did I know), I would feel accomplished, feed my family, the fruits of my labour wouldn't sit around for ages. "No we can't throw that out, Mum made that!"That's another thing why cross stitch never was an option....besides the fact that I can't keep count. Never ever did I think that this bread baking was going to be a time consuming hobby, expanding into a never ending -wish-list consisting of new books, new pans, flour and new recipes that need to be baked!

rustic potatoe julia

The blog I started on a Sunday afternoon was a result from the bread baking as well. I was home alone, waiting for my bread to come out of the oven (!) so I could take it with me, back to a friends birthday party I left for a couple of minutes, meanwhile searched the Internet for recipes.... What I found was not only a wealth of recipes but blogs as well, food blogs! People that like me, loved to cook and/or bake, and wrote about it and showed their results. I found a way to capture my baking and write as well. (And another time consuming hobby.....).

This being said, what I didn't think of was that these guys under my roof are growing like, eeh well you know, growing like boys, and that's not the worst part, they eat as if they're going to grow tall as a tree... I can bake all day and always be behind schedule. I've even gotten as far as leaving little notes on my cooling loaves that say: Keep off!! Not photographed yet! Has to COOL!

Just for fun, a few days in shorthand and an introduction to my newly acquired books!

Saturday: two smaller pan loaves, Exceptional Breads by Dan Lepard, whole grain, lasted a day and a half.

Sunday I made three ciabatta's, -pictures will follow-, from Peter Reinhart the Bread Bakers Apprentice. Friends came over for a glass of wine, brought some cheeses and spreads, one ciabatta accounted for. It was nearing dinnertime, I had a pot home made vegetable soup, 9 people having soup...bye bye ciabatta!

(first picture) Monday I had 8 mini Anadama breads baked in a mini loaf pan, and their bigger regular sized brother...disappeared in a day. (again the Bread Baker's Apprentice). I love my mini-loaf pan, they make cute little bite size slices of bread, or when you wield your knife in another direction more than bite size sandwiches.

Monday night: two rustic potato loaves (Baking with Julia, middle photo). Shhhht, still one left!

Tuesday: two Swedish limpa's (Baking with Julia), cooling as we speak and not even discovered by the crowds. Photos to follow soon.

Edit: planned to post this a week ago, don't know what's going on here, some evil spirits have taken a hold on my laptop.... can't post, can't do pictures, nothing!